Fedora has recently released its stable version of Fedora 27 in 3 different editions namely, Fedora 27 Workstation, Fedora 27 Server and Fedora 27 Atomic Host edition. In this article, we’ll looking at the step by step guide on installing Fedora 27 Workstation easily in your desktop or laptop.
Fedora 27 Workstation – New Features
Fedora 27 has included a lot of new features with its latest release and some of the prominent features have been listed below:
- GNOME 3.26 desktop environment
- LibreOffice 5.4
- Support for Windows 7
- Option to create bootable SD cards to boot Raspberry devices
- Comes with the latest version of JavaScript 8
- A light preview on Java 9 tech
- Updated with latest versions of GNU C Library and Ruby on Rails
Step-by-Step Guide to Install Fedora 27 Workstation
Step 1) Download Fedora 27 Workstation
First step is to ensure that you download the latest version of Fedora 27 Live Image into your system. You can download it from here. In this installation guide, we’ve used the Fedora 27 Workstation 64 bit version. So download accordingly to your system requirements.
Step 2) Create a Bootable USB / DVD
To create a bootable USB disk/DVD, burn the ISO file downloaded from the official fedora website. Once the bootable disk is created, start booting your system with the USB disk/DVD you have created just now. Make sure the boot sequence is changed to USB disk / DVD
Step 3) Start Preparing For the Installation Process
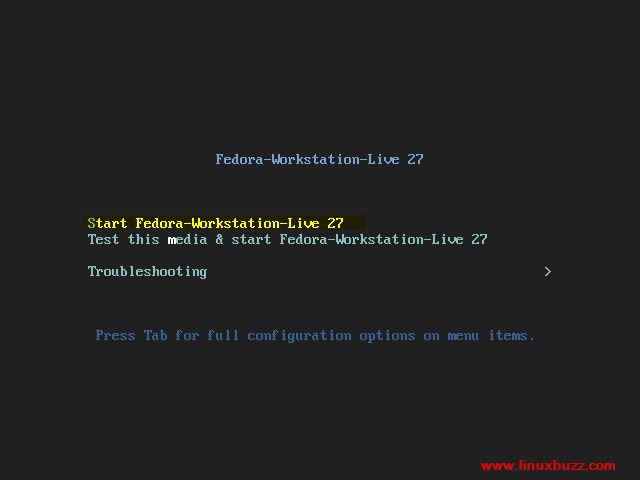
Once you boot your system with the bootable disk, you’ll be presented with the following options as shown in the screen below, choose the option “Start Fedora 27 Workstation Live” to start preparing for the installation
Step 4) Install to Hard Disk
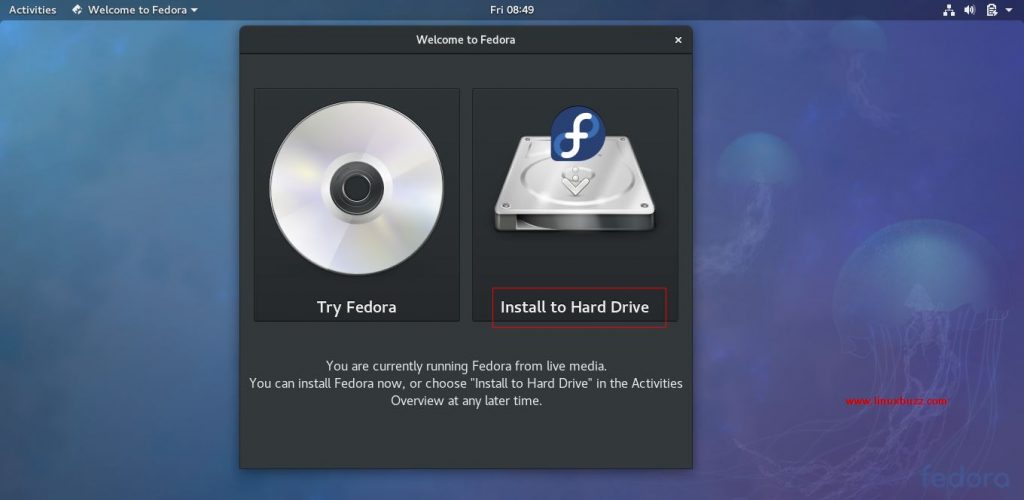
Click “Install to Hard Drive” in the screen shown below
Step 5) Choose Your Language
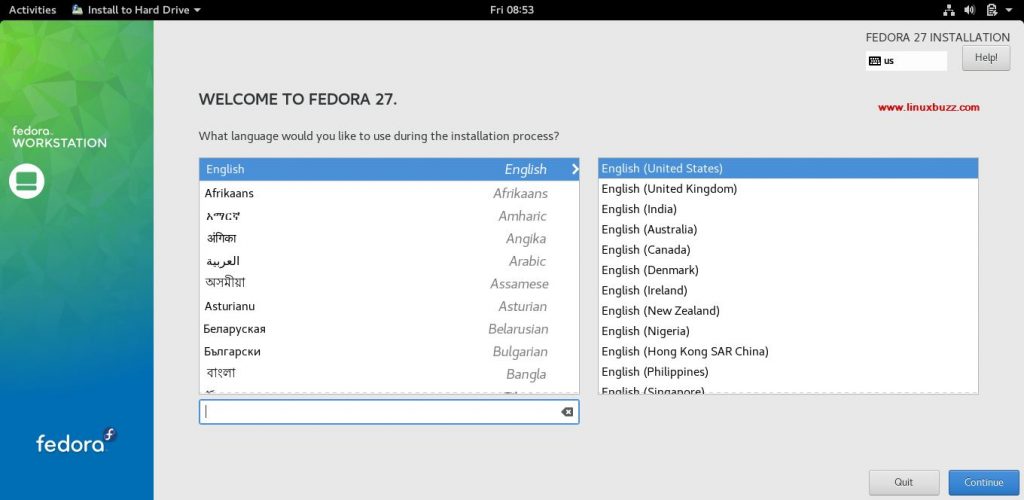
Then select your language and click “Continue”
Step 6) Installation Summary
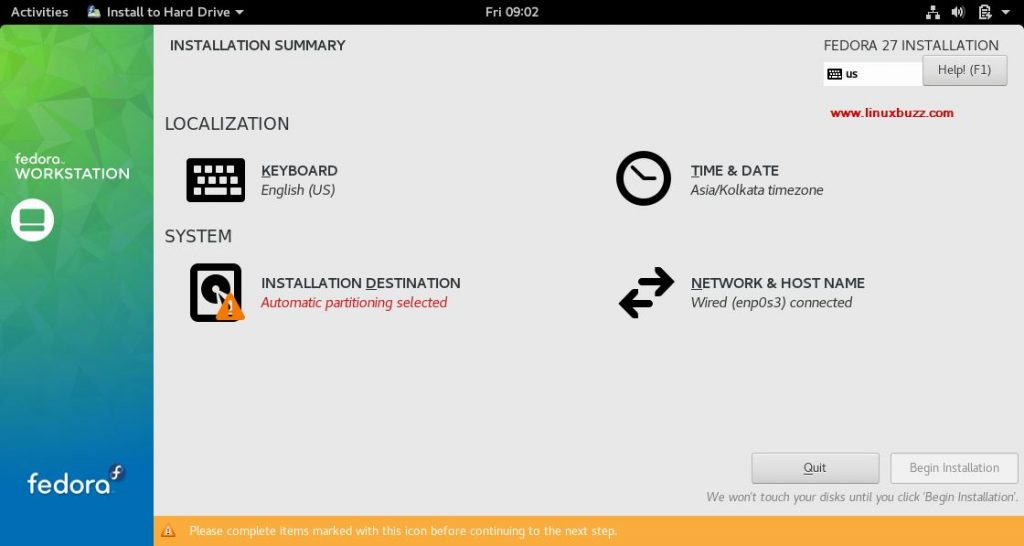
In the next screen, you’ll be presented with the installation summary screen with options to set your keyboard layout, date & time, installation destination and network host name.
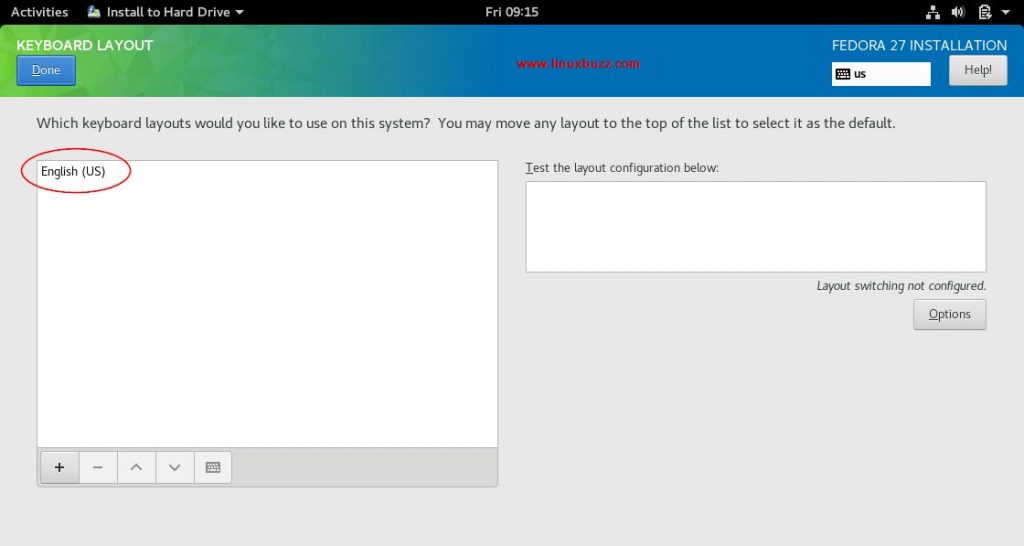
Click Keyboard layout to go to the next screen and select the desired keyboard layout required. Click “Done” when select to move on to the next screen.
Step 7) Setup Date and Time
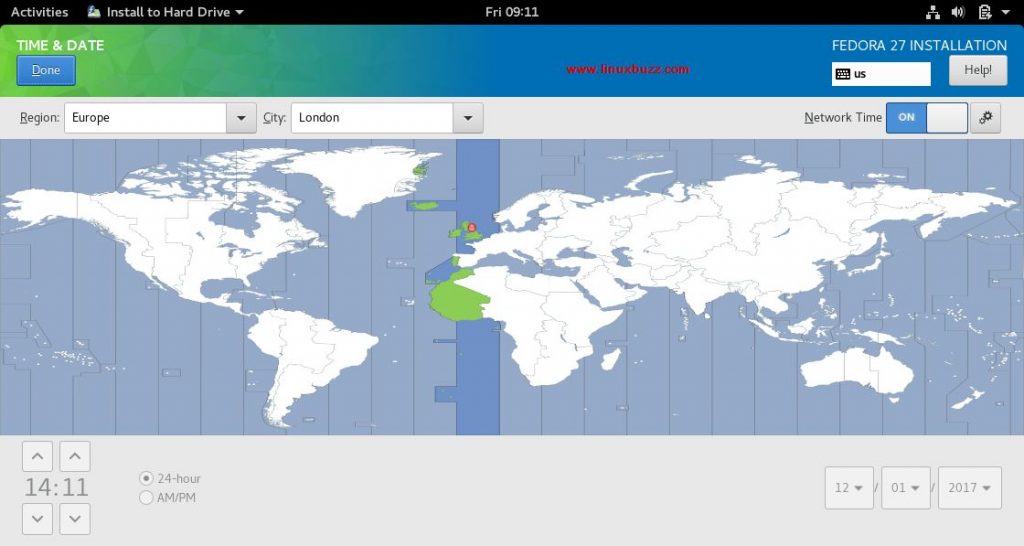
You’ll be taken back to the Installation Summary screen, click “Time and Date” to select your region, city and set your date and time accordingly. Click “Done” when select to return to the previous screen and select Network & Hostname
Step 8) Setup Keyboard Layout
Step 9) Setup Network & Hostname
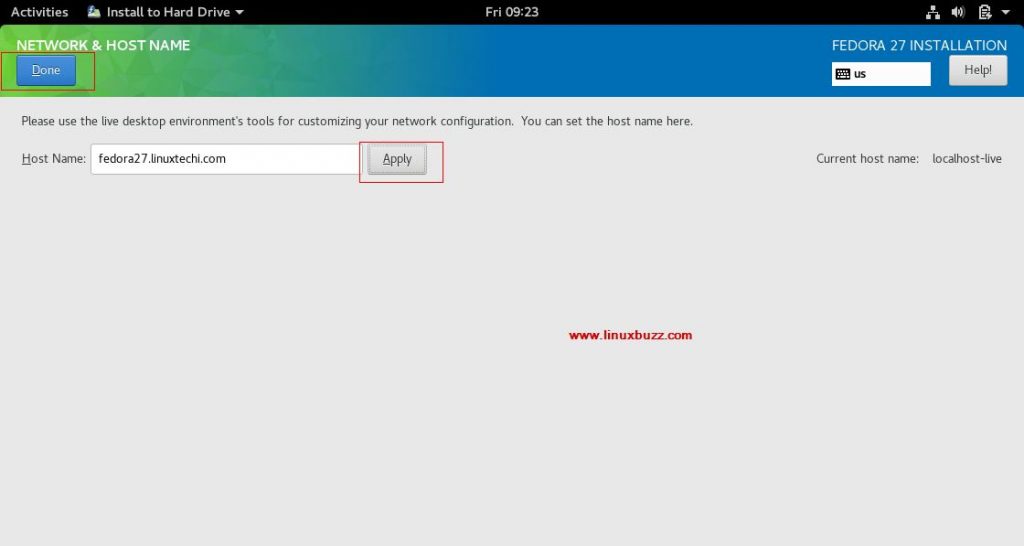
In the Network & Hostname menu, specify your system name and click Apply and finally hit “Done” button on top to return to the previous screen.
Step 10) Choose Installation Destination & Storage Configuration
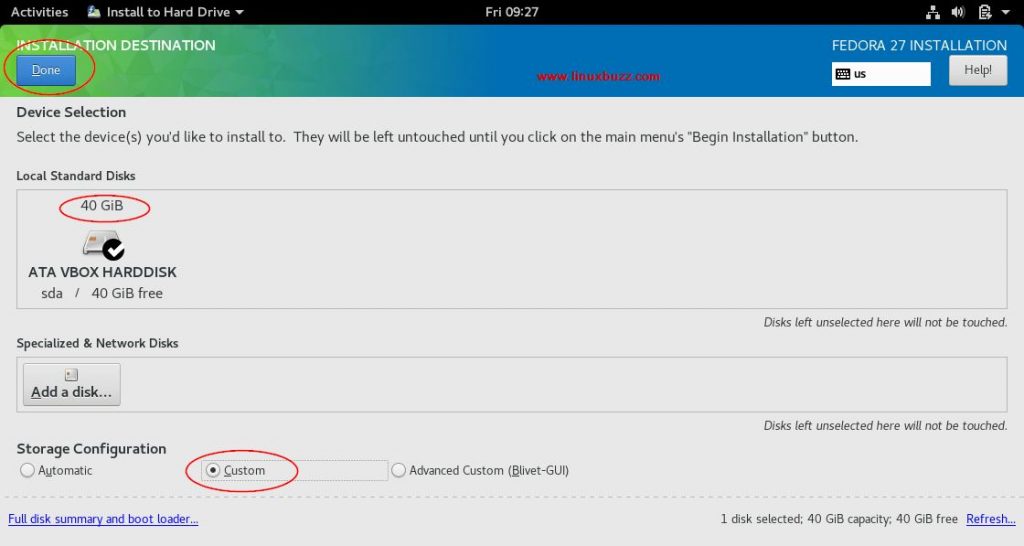
The next step is the most important part where you’ll be defining the partition scheme for your system. You can either partition it automatically or define your own customize partition scheme.
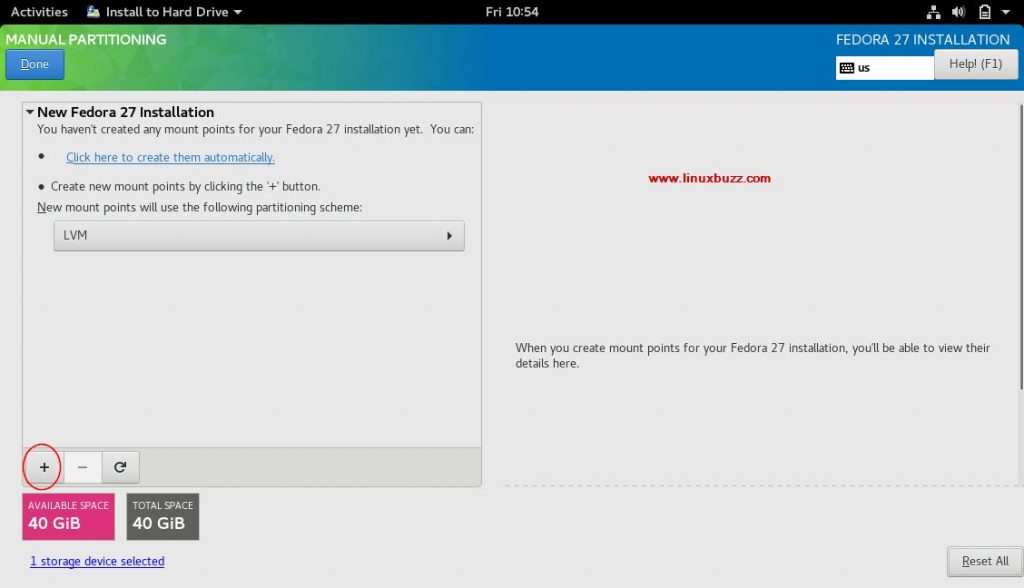
Now click on “Installation Destination“. Since i am going to show you how to create partition manually, Choose “Customize” option in the Installation Destination screen. And click “Done” button to go to the next screen.
My system has 40GB available space and based on that I’ll be creating the following partition
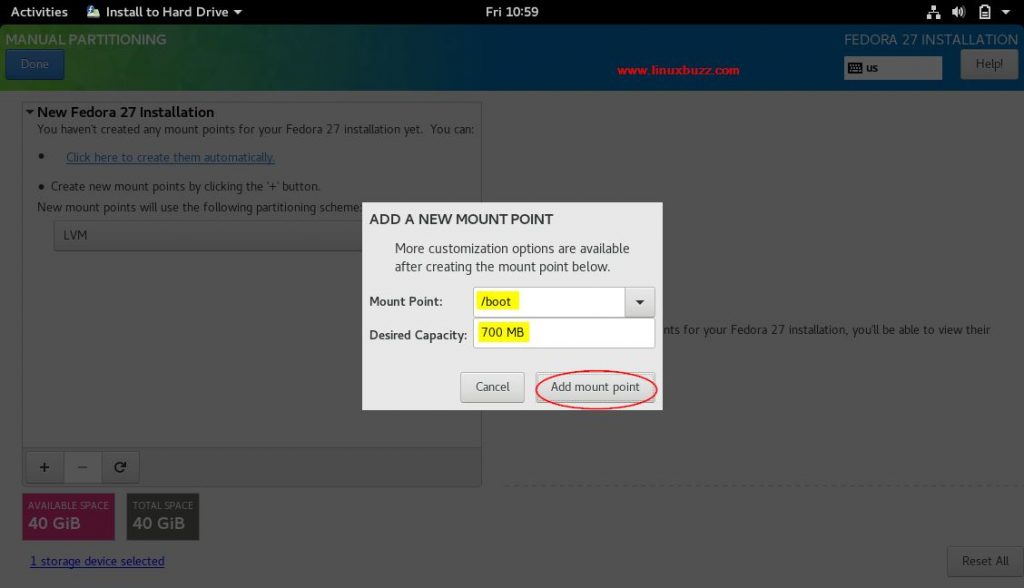
- /boot = 700 MB
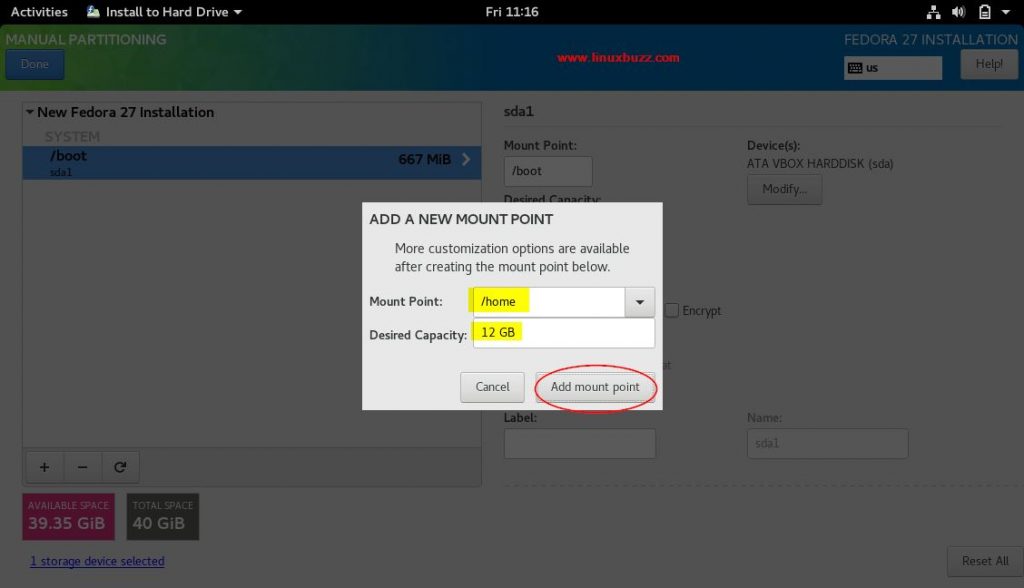
- /home = 12 GB
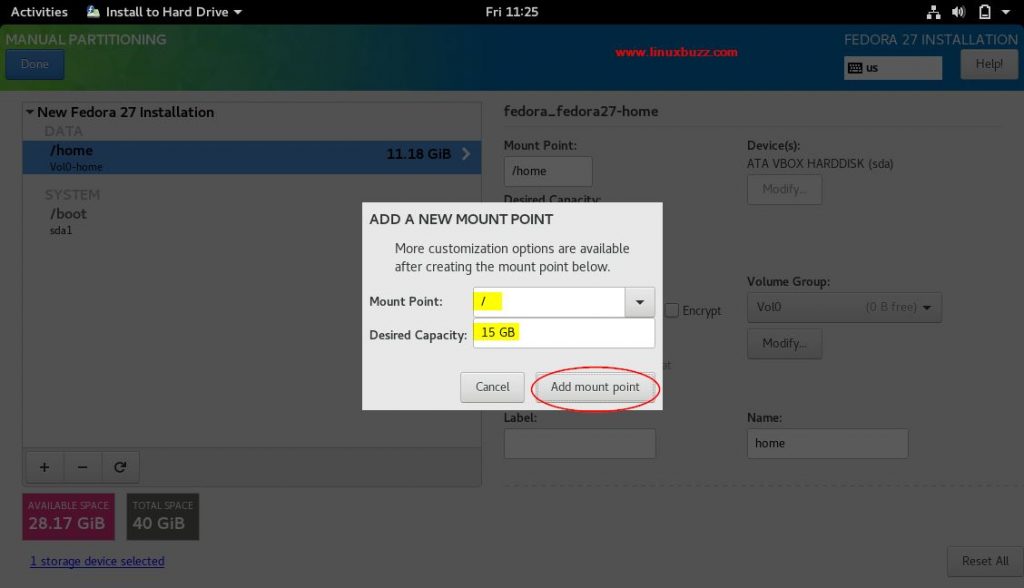
- / = 15 GB
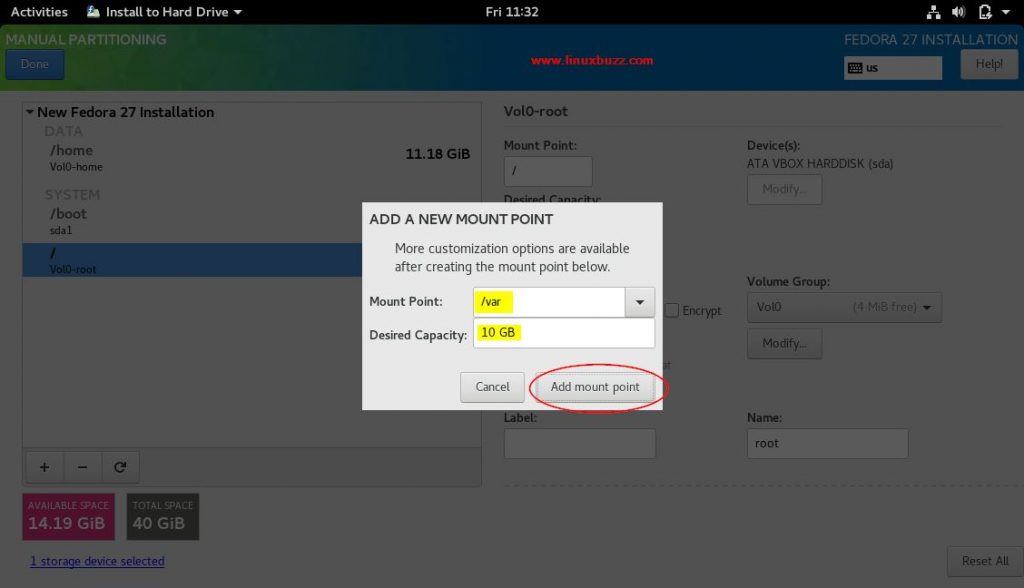
- /var = 10 GB
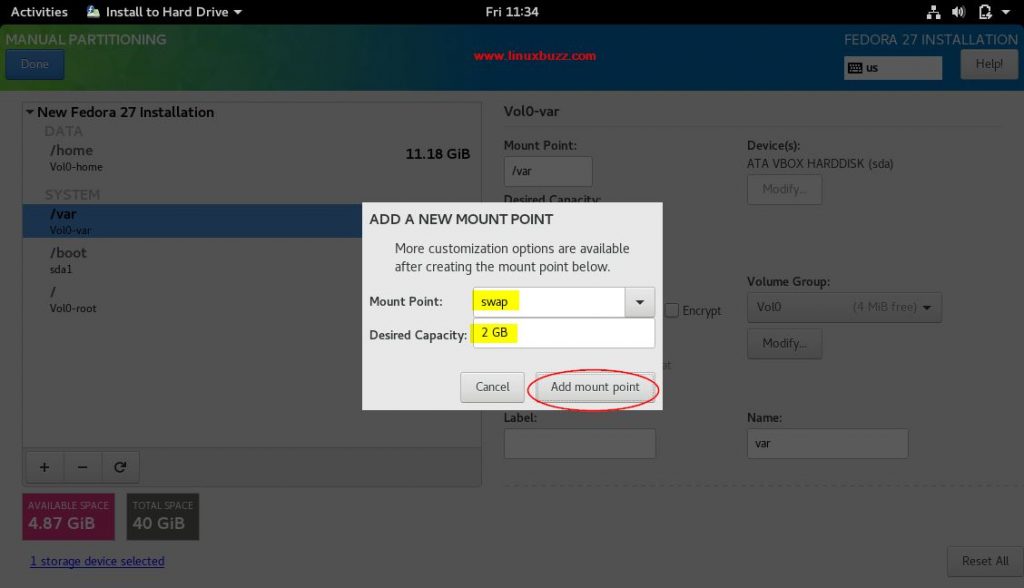
- swap = 2 GB
The size of the partitions depends on your disk size and to start creating partitions, simply click the (+) symbol.
Now create boot partition of size 700 MB & file system type as ext4
Click on “Add mount point”
Create /home Partition of Size 12 GB and File system as ext4.
Similarly Create / and /var partition of Size 15 & 10 GB respectively and also specify the filesystem type as ext4.
Create Swap partition of size 2 GB
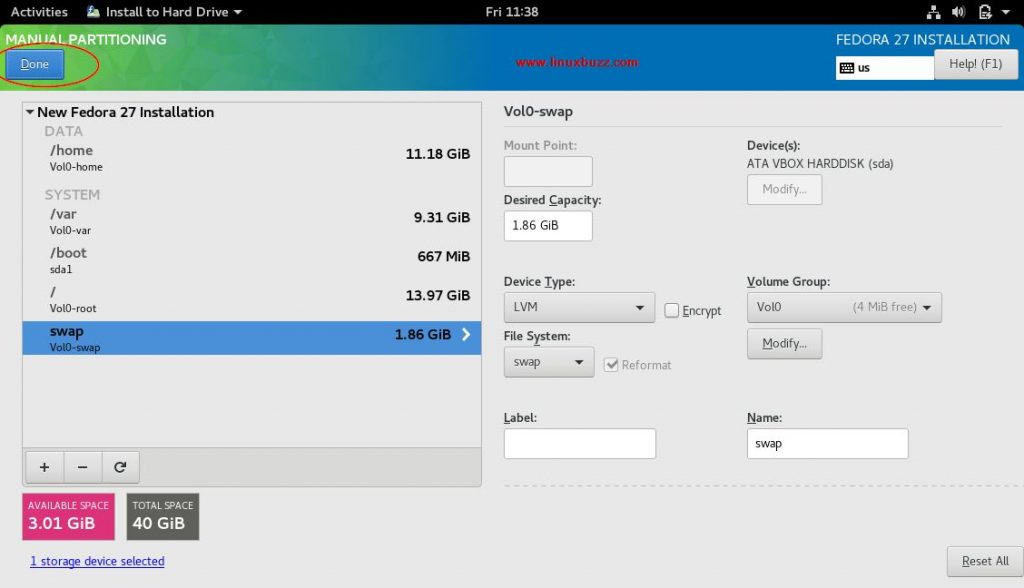
Once you created all partitions, you disk summary would be like this and once checked, click “Done” to continue
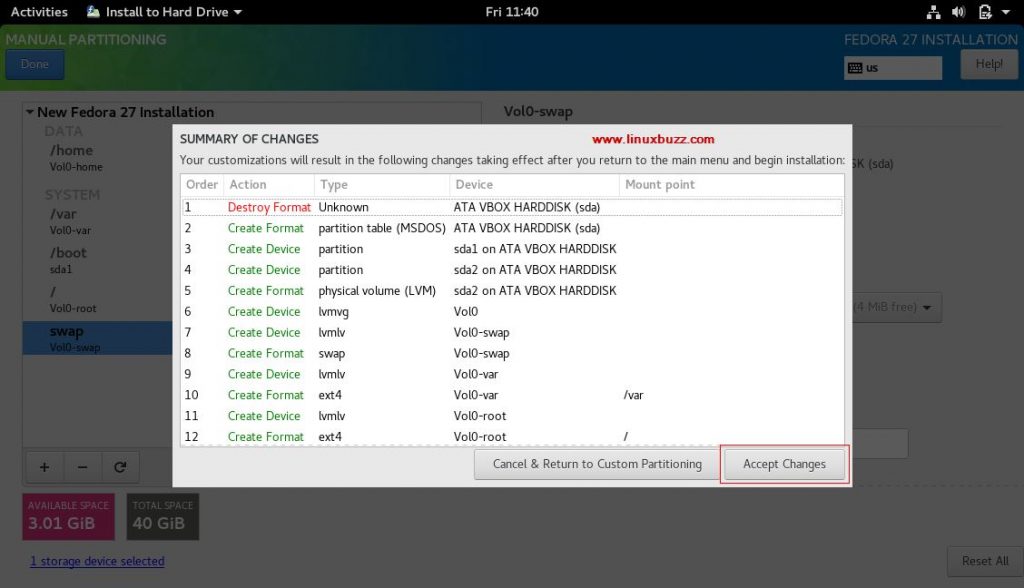
Check and accept the changes made
Step 11) Begin Fedora 27 Workstation Installation
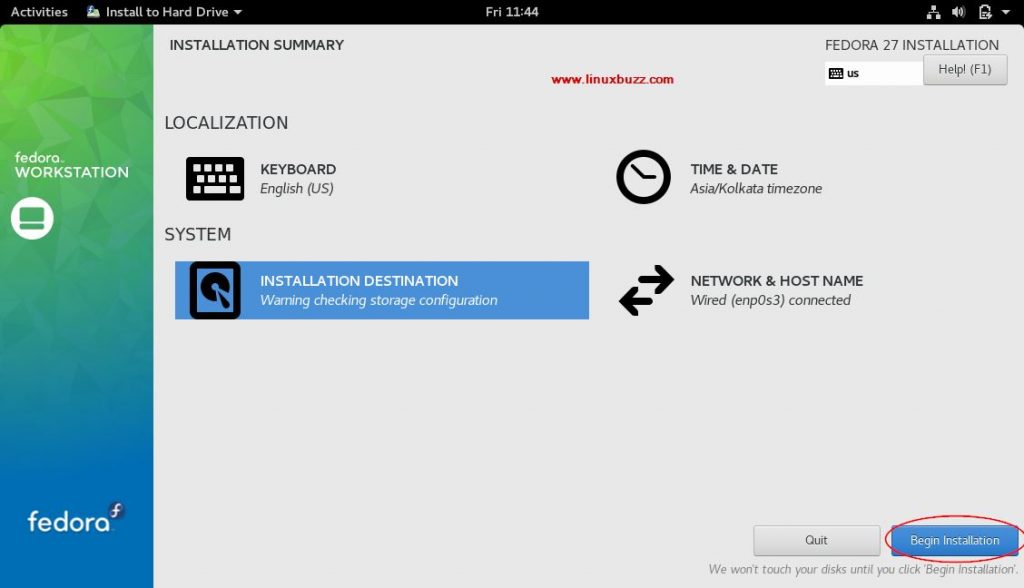
Now all changes and core-installation configurations have been made, Click “Begin Installation” to start the installation process.
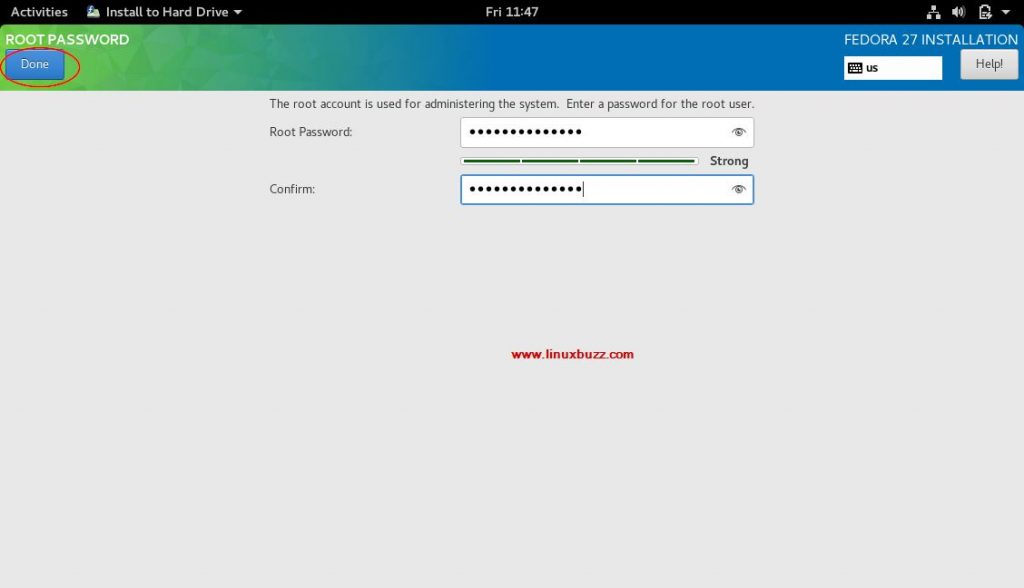
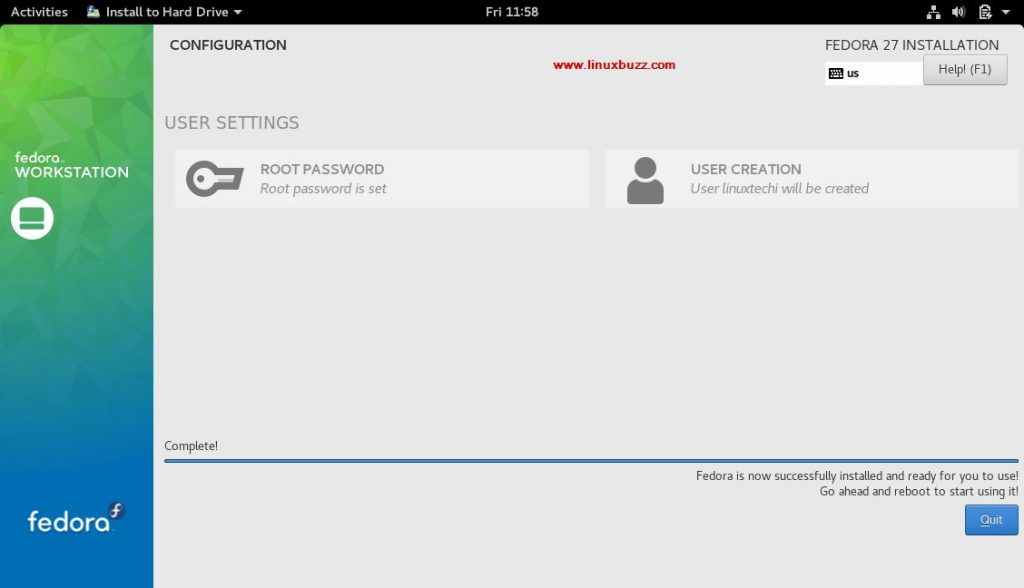
Next step is the User settings, click on Root Password to configure your root password for Fedora 27 Workstation.
Provide your Root Password. Click “Done” when finished to return to previous screen.
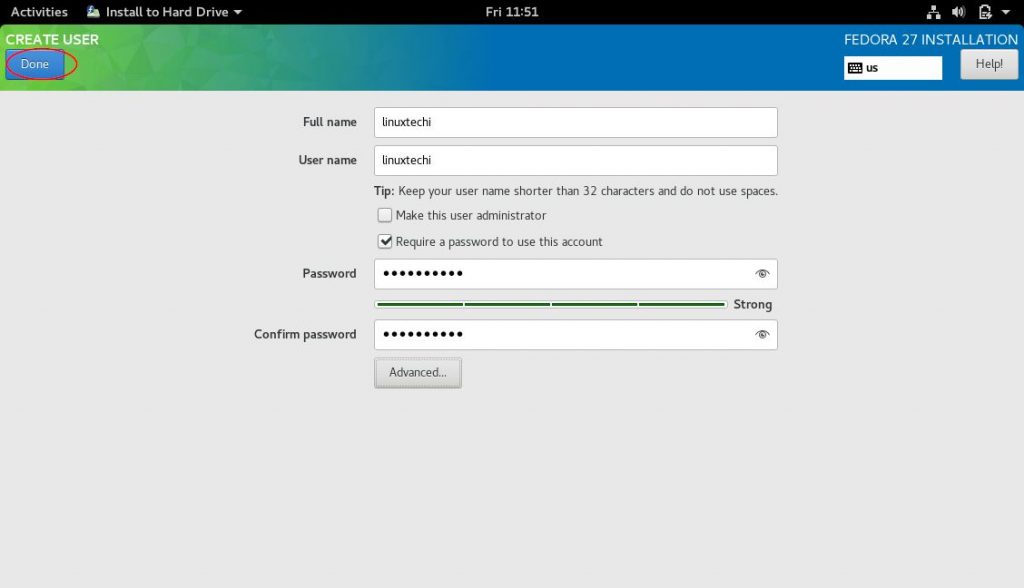
In the User creation screen, provide your Full name, Username, Password and Confirm Password to create a new user for your Fedora 27 Workstation. Click on “Done”
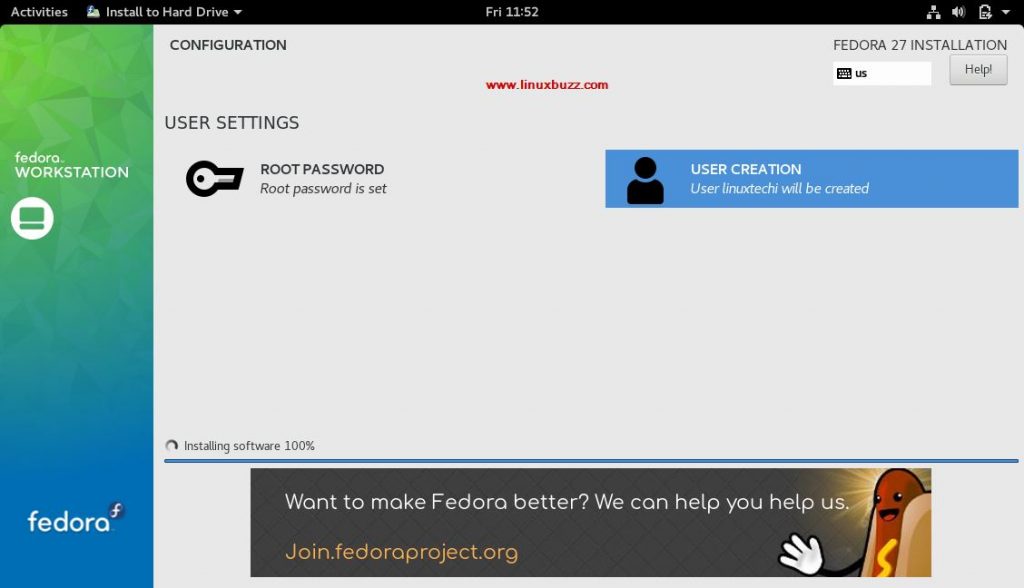
At this point of time, our fedora 27 installation is progress,
Once the installation is completed, installer will notify us to reboot the machine, also make sure to remove the bootable USB/DVD during restart
Click on ‘Quit’ to reboot your machine
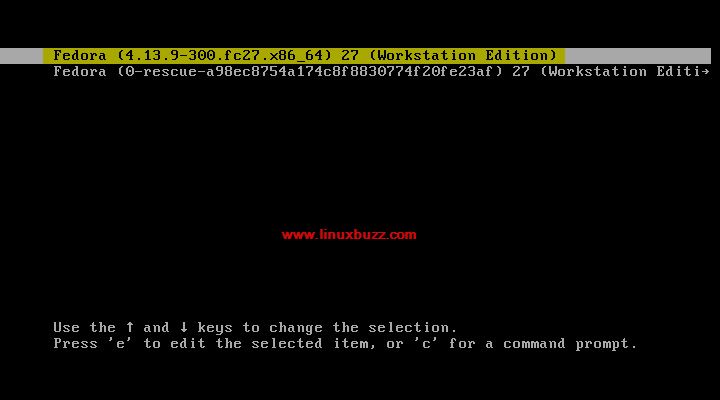
Step 12) Fedora 27 Boot Menu (Grub 2)
Once you restart your system, you’ll be presented with the Fedora 27 boot menu and Select the first option Fedora Workstation Edition and will take you to the Login Window
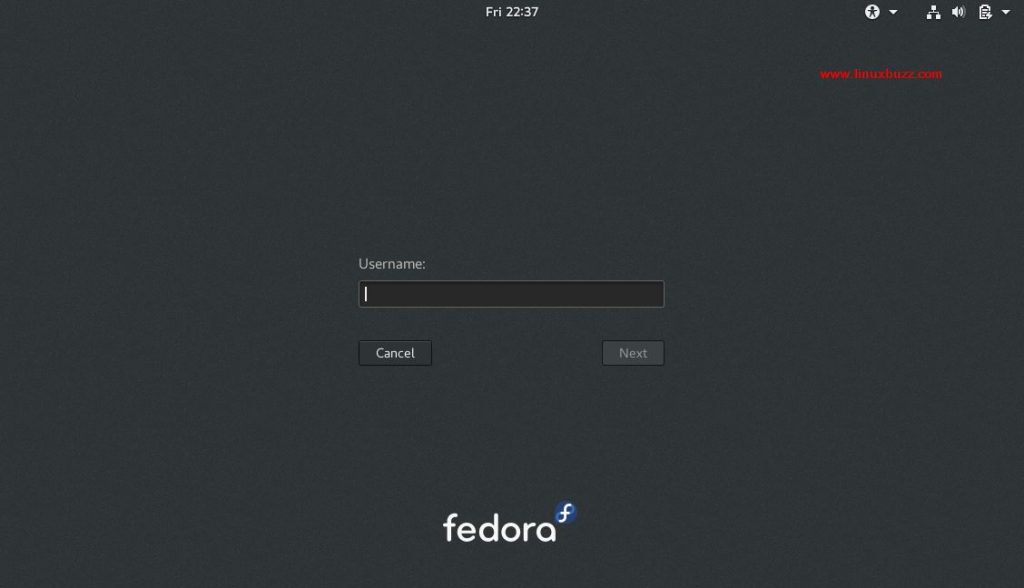
Step 13) Fedora 27 GDM Login
Click on your User name, provide your password specified during the User creation process to enter into the world of Fedora 27.
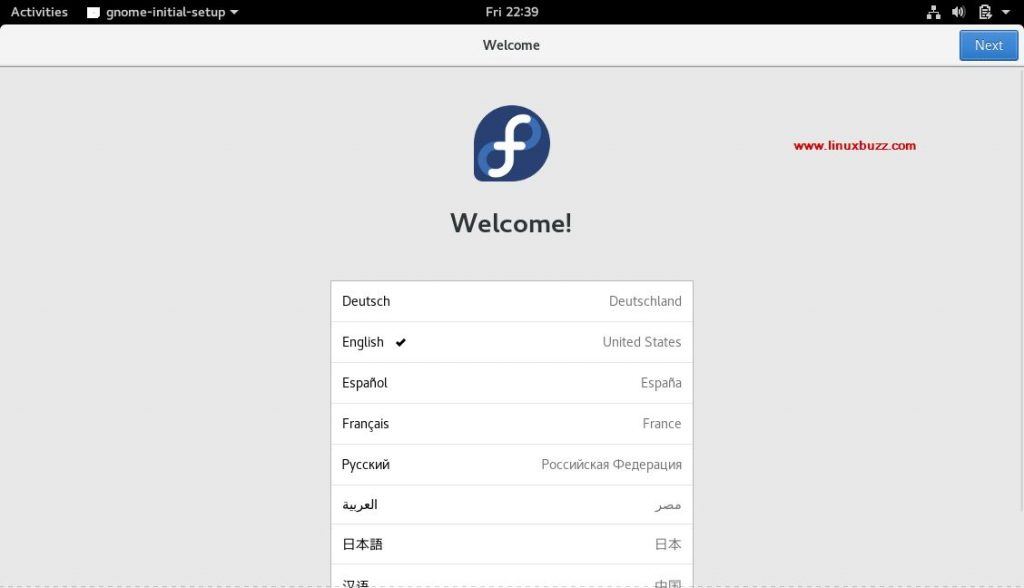
Step 14) Fedora 27 GNOME 3.26 Welcome Screen
Once logged in, you’ll be presented with the GNOME desktop environment asking you to configure your language, typing layout along with privacy settings etc.
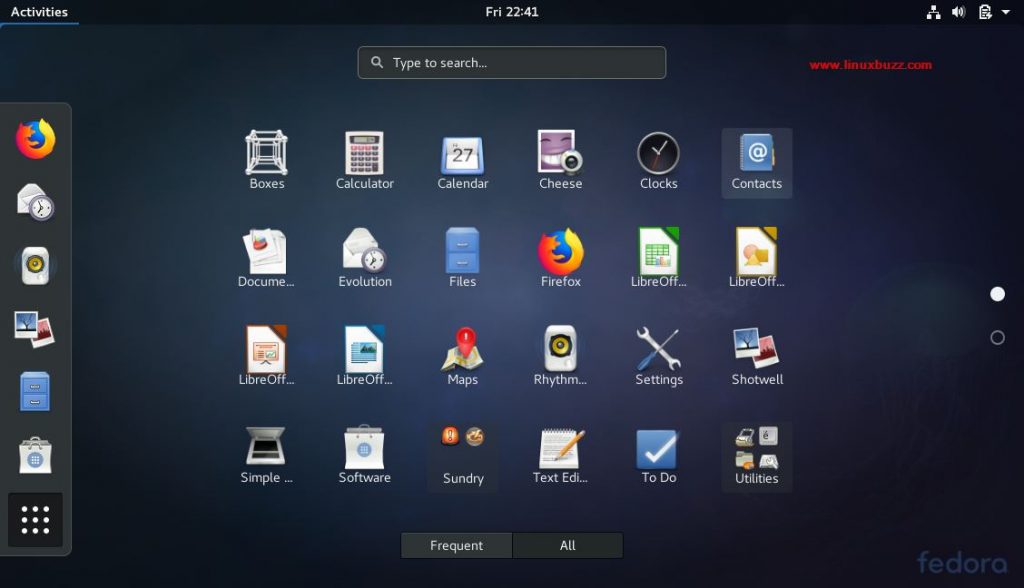
Complete the remaining instructions and then finally we will get below Gnome Desktop
That’s it guys!!! Fedora 27 Workstation is successfully installed and please post your queries and suggestion in the comments section below and we’ll be happy to respond to all your queries as soon as possible. See you in the next article, Bye!!! 🙂

My wireless adapter was not recognized, help!