Cockpit is a free web-based graphical tool to manage linux server and is used to perform all day-to-day administrative tasks. Cockpit is best suited to the admins who have moved from windows to Linux as it provides easy and graphical way to manage Linux servers.
Using cockpit web console, following significant tasks can be performed with ease,
- View and Modify Network Settings
- User Management
- Create and Manage Virtual Machines
- Download and run containers
- Inspect System and hardware logs
- Manage System Firewall
- Apply Software Upgrades
Prerequisites for Cockpit Installation
- Minimal Rocky Linux 8 installation along with kernel 3.14+ or higher
- Regular User with Sudo privileges
In this guide, we will cover how to install Cockpit web console on Rocky Linux 8 step by step.
1 ) Install Cockpit Package via dnf command
Cockpit package is available in the default package repositories of rocky linux. So, its installation is straight forward.
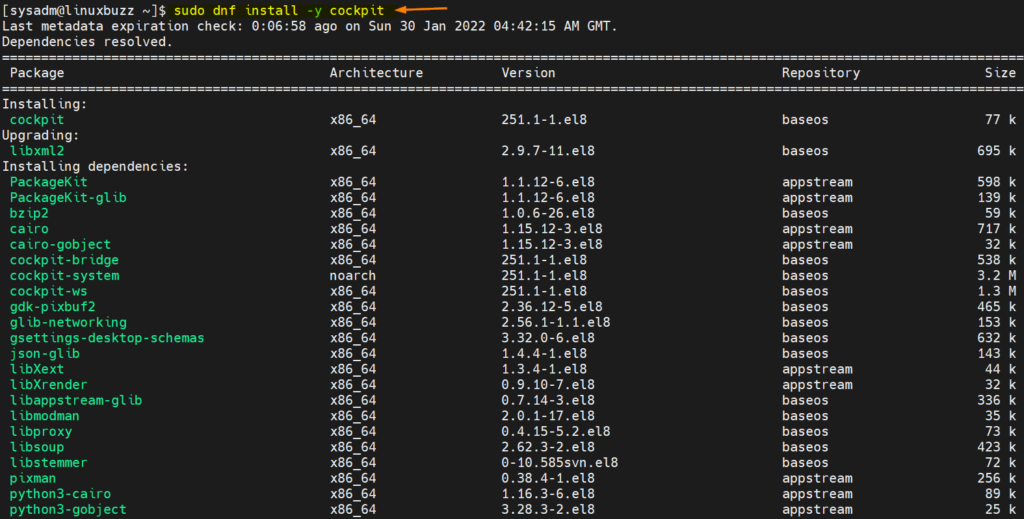
Login to Rocky Linux 8 system and open the terminal and run beneath dnf command to install cockpit package along with its dependencies.
$ sudo dnf install -y cockpit
If you wish to manage virtual machines using cockpit then install following ‘cockpit-machines’ package, run
$ sudo dnf install -y cockpit-machines
If you wish to download and run containers using cockpit then install following package ‘cockpit-podman’
$ sudo dnf install -y cockpit-podman
2) Start Cockpit Service and allow cockpit in firewall
Once cockpit and its dependencies are installed successfully then start and enable its service using following systemctl commands.
$ sudo systemctl start cockpit.socket
$ sudo systemctl enable cockpit.socket
Run beneath command to view the status of cockpit service,
$ sudo systemctl status cockpit.socket
Above confirms that cockpit service is up and running. Let’s allow cockpit service in firewall by running following commands,
$ sudo firewall-cmd --add-service cockpit --permanent
$ sudo firewall-cmd --reload
3) Access Cockpit Web Console
To access cockpit web console, type following URL in browser.
https://<Server-IP-Address>:9090
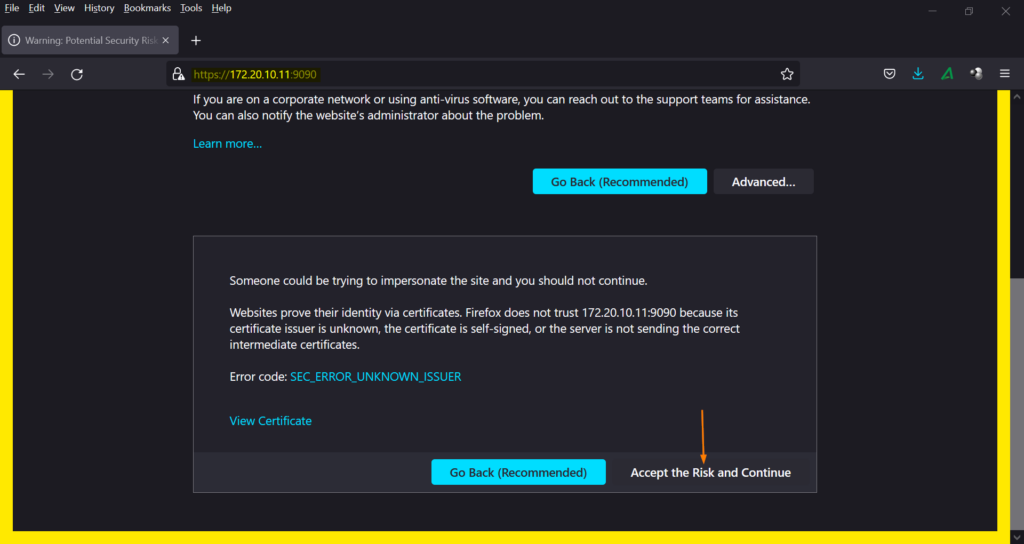
As the self-signed certificates were used while installing cockpit, so click on ‘Accept the Risk and Continue’
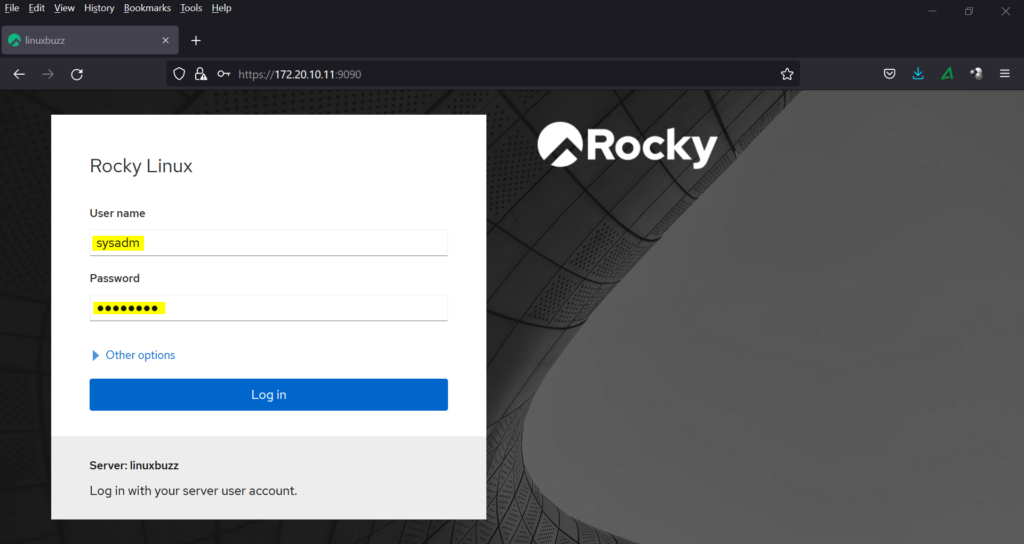
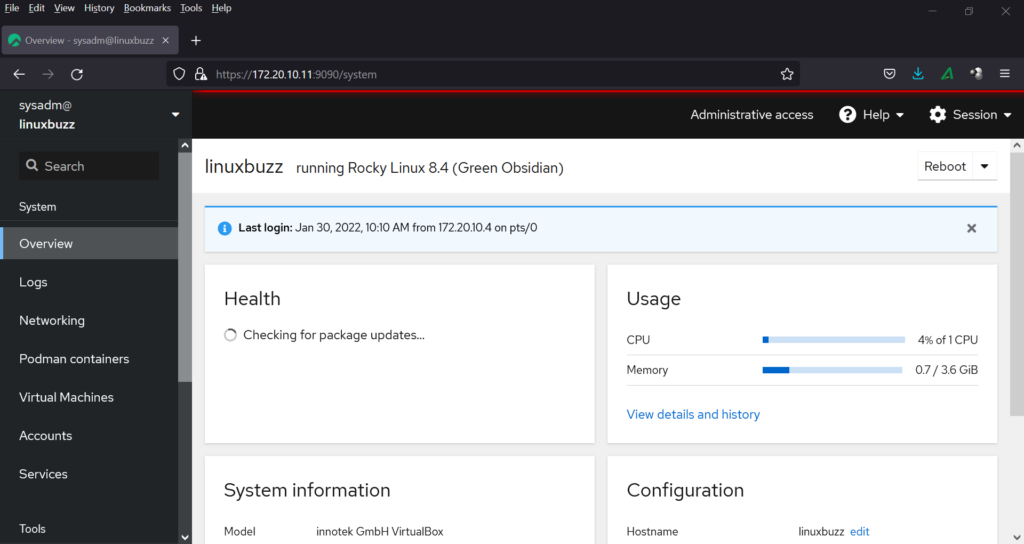
Use the sudo user and its credentials and then click on ‘Log in’. We will get the following cockpit dashboard,
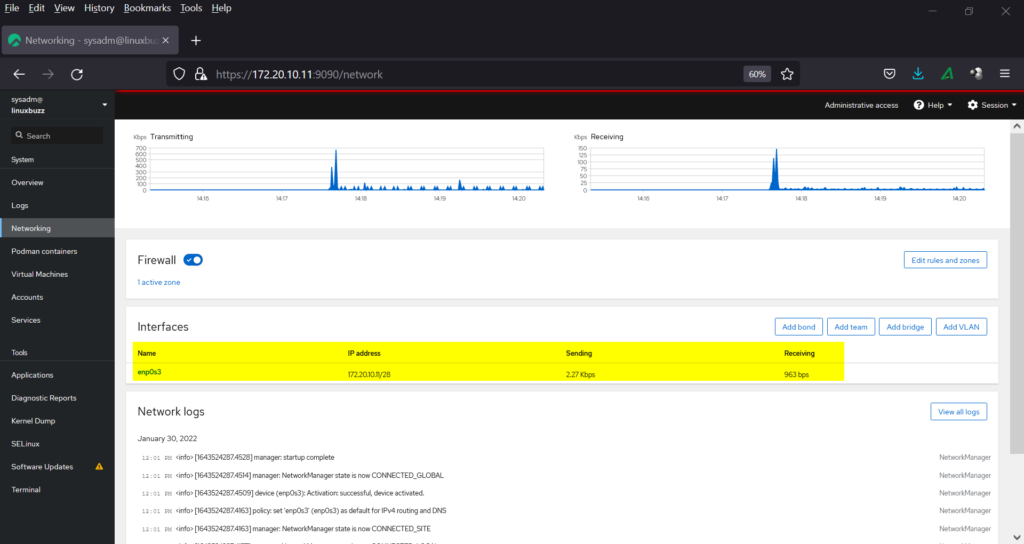
To view networking details and logs, click on ‘Networking’ tab, there we will be LAN card details.
Similarly, we have ‘Podman Containers’ and ‘Virtual Machines’ tab for managing containers and virtual machine respectively.
That’s all from guide. Please do share your queries and feedback in below comments section.
Also Read: How to Increase LVM Partition Size in Linux
