SFTP (Secure File Transfer Protocol) is a secure version of FTP protocol that uses Secure Shell (SSH) to transfer files. It is similar to SCP, but it has access to various SSH operations like changing file permission and ownership, downloading credential files, etc. which we don’t want to allow over SFTP protocol. By default, SFTP uses the standard SFTP so we need to configure the chroot jail environment for all the SFTP users. In simple terms, we can say it’s a jail environment that prevents users from changing directories.
In this article, we will implement a chroot environment over an SFTP server. To demonstrate this, I have used the Ubuntu 20.04 system. Before Continuing to the actual process let’s see the possibilities of using the SFTP server without the chroot environment.
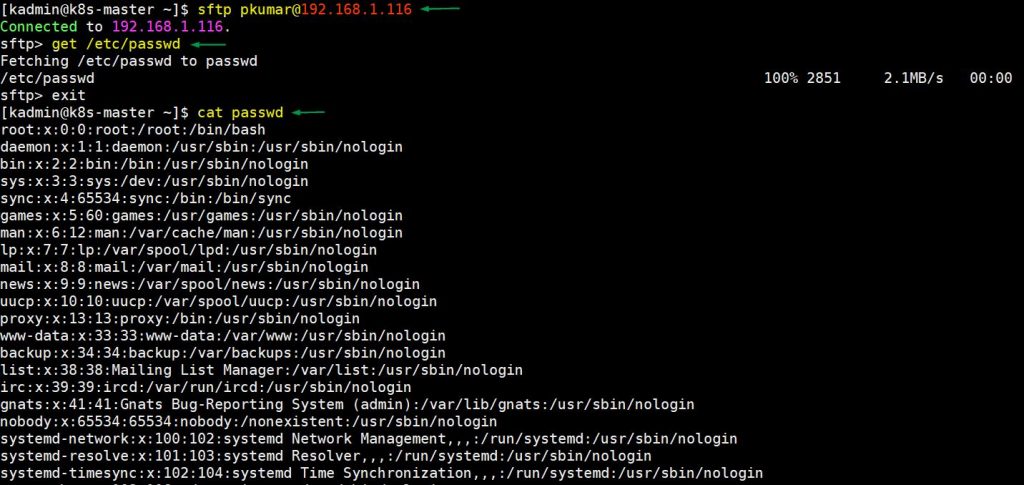
In the following example, users can easily download system user data file using sftp protocol. In fact, there are no restrictions, users can download any file from any folder.
Now, we will configure SFTP with a chroot environment in such a way that users cannot go outside of his/her home directory and can download and upload files to his/her home directory only.
Create a Group for SFTP
We need to create a group and add users to that group. Users in that group will be used for file transfer purpose and will have chroot jail environment. To create a group, execute following command,
$ sudo groupadd sftp_group
Create User for SFTP
First of all, let’s create a new user that is used for SFTP protocol. If you already have a user for sftp then you don’t need to create new user.
$ sudo adduser sftp_user
Once a user is added we need to add that user to the group we just created for sftp. To do so, run command in the following way.
$ sudo usermod -G sftp_group sftp_user
As you can see in the following output, sftp_user user is now a member of the sftp_group. To check the group run below grep command,
$ grep sftp_group /etc/group
sftp_group:x:1002:sftp_user
$
Now, change the ownership of sftp_user home directory to root.
$ sudo chown root. /home/sftp_user
Create a new directory that has ownership of sftp_user for the user to upload the file.
$ sudo mkdir /home/sftp_user/upload
$ sudo chown sftp_user. /home/sftp_user/upload
Next, disable the shell for the sftp user. For that execute:
$ sudo usermod -s /bin/false sftp_user
Configure SSH Config File
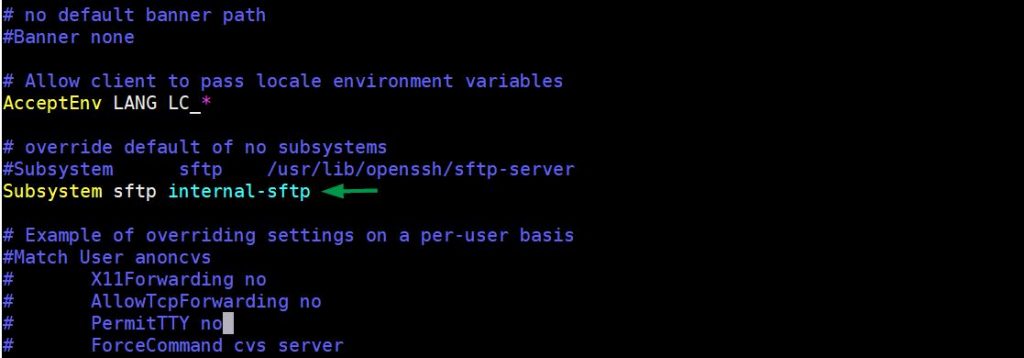
Open the sshd_config file in vi editor then comment the existing Subsystem directive and add the following one.
$ sudo vi /etc/ssh/sshd_config

Subsystem sftp internal-sftp
Add the following lines at the end of the file. In the following line of code, Match Group indicates that the following directive will be applied to sftp_group users only. And %h indicates Users will be in chroot environment in their home directory. ‘ForceCommand internal-sftp’ means that it instructs sshd to use sftp commands only.
Match Group sftp_group
        ChrootDirectory %h
        ForceCommand internal-sftp
Once you are done with all the changes save & exit the file and restart the sshd service.
$ sudo systemctl restart sshd
Testing SFTP Chroot Environment
It is recommended to share the ssh keys between client and sftp server. So, in my case I have execute the following command to enable keys-based authentication,
$ ssh-copy-id sftp_user@192.168.1.116
output
As you can see in the following example, we have tried to change the directory, but output says that No such file or directory in the console even though it exists.
Conclusion
Thank you for reading this article. I hope this article helps you to understand how we can implement a chroot environment for the sftp server.


