Linux Mint has launched a new Linux Mint Debian Edition operating system. In short it is also known as LMDE. Code name for LMDE 5 is ‘Elsie’, it similar to Linux Mint but in place of Ubuntu. It is using Debian and its packages are provided by Debian instead of Ubuntu.
The main objective for launching this new LMDE OS is that it continues to offer the same user experience even if Ubuntu disappear. In other words, it will remove the dependency on Ubuntu.
In this guide, we will learn how to install Linux Mint Debian Edition 5 (LMDE) step by step with screenshots.
Minimum System Requirements for LDME 5
- 2 GB RAM or more
- 2 CPU Core or more
- 20 GB free hard disk space
- Bootable Media (USB Stick)
- Stable Internet connection (Optional)
Without any further delay, let deep dive into the installation steps.
1) Download LMDE ISO file
Use following URL to download iso file,
Once the ISO file is downloaded then burn it into the USB stick and make it bootable.
2) Boot System with Bootable Media
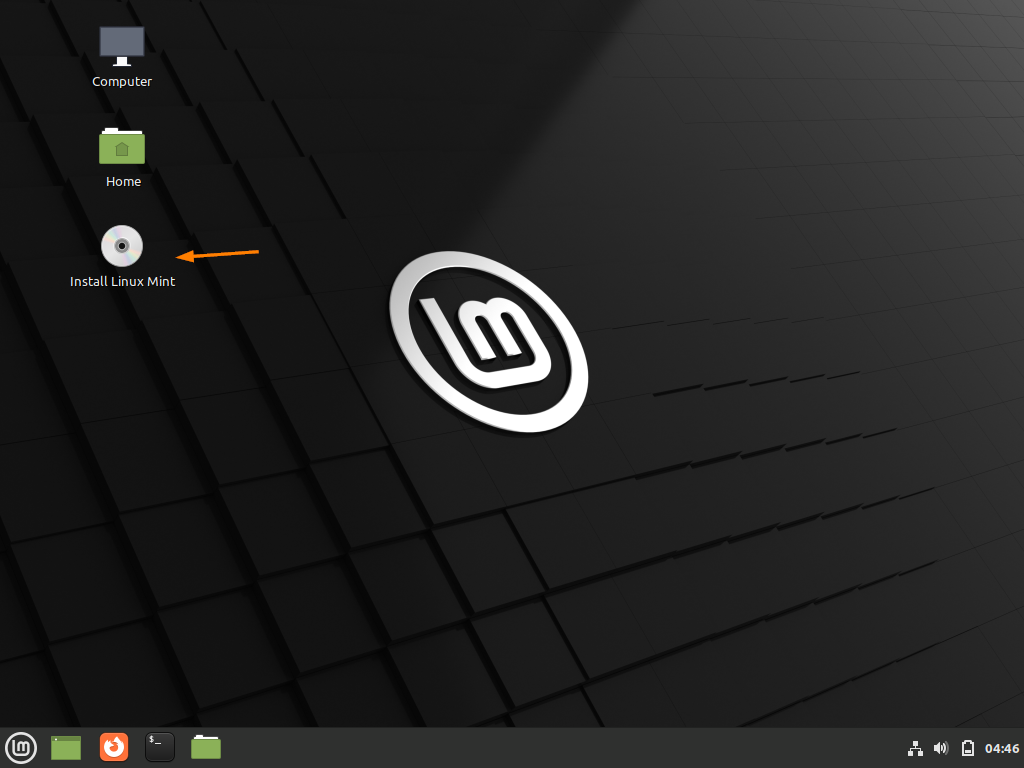
Boot the system with bootable media, in our case it is USB stick. One might have to go to bios settings and set boot media as USB. Once system boots up, we will get the following screen,
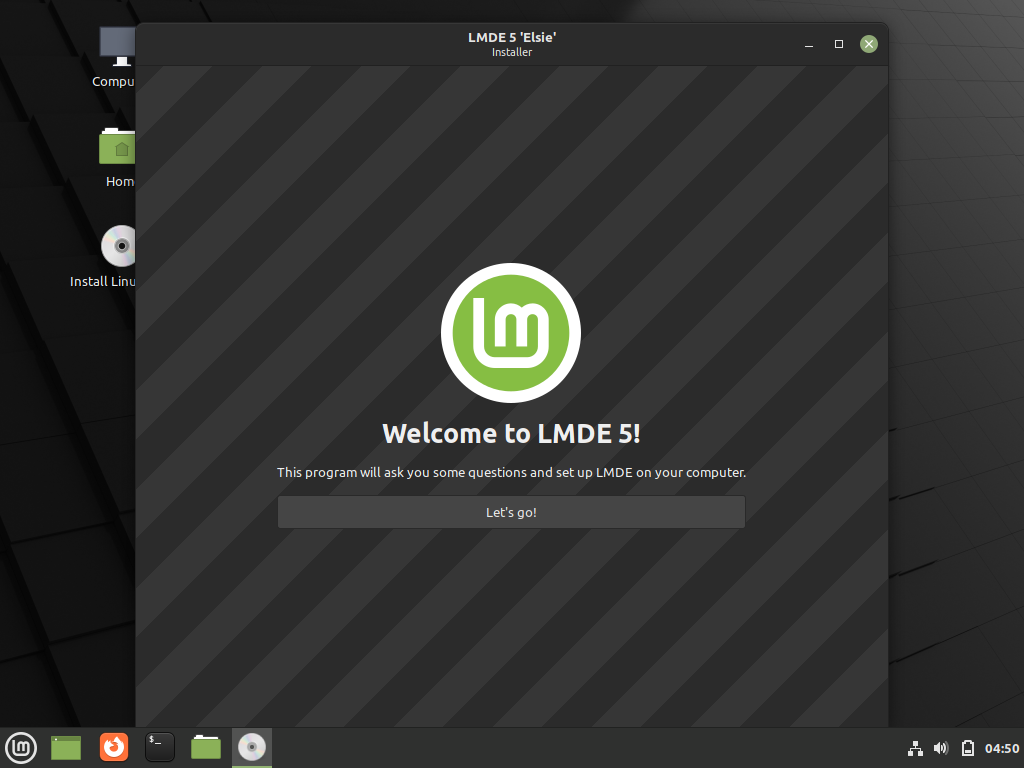
Click on ‘Install Linux Mint’, we will get following screen
Choose ‘Let’s go!’ option,
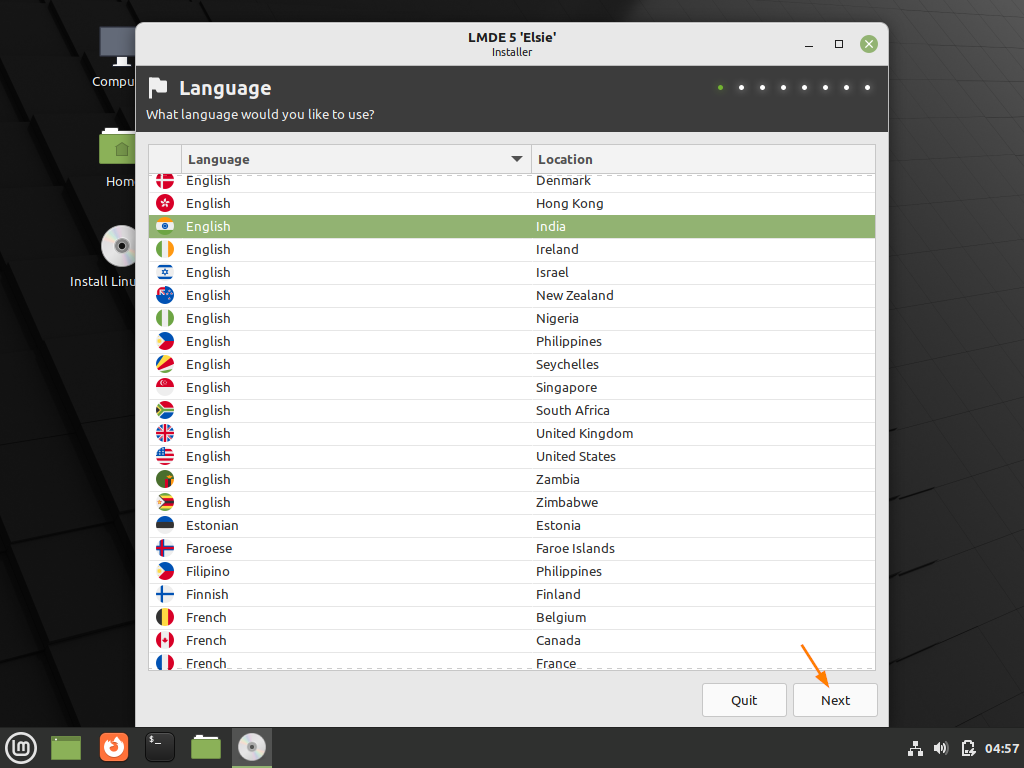
2) Choose Language and Location
In this step, choose your preferred language and location and then click on Next,
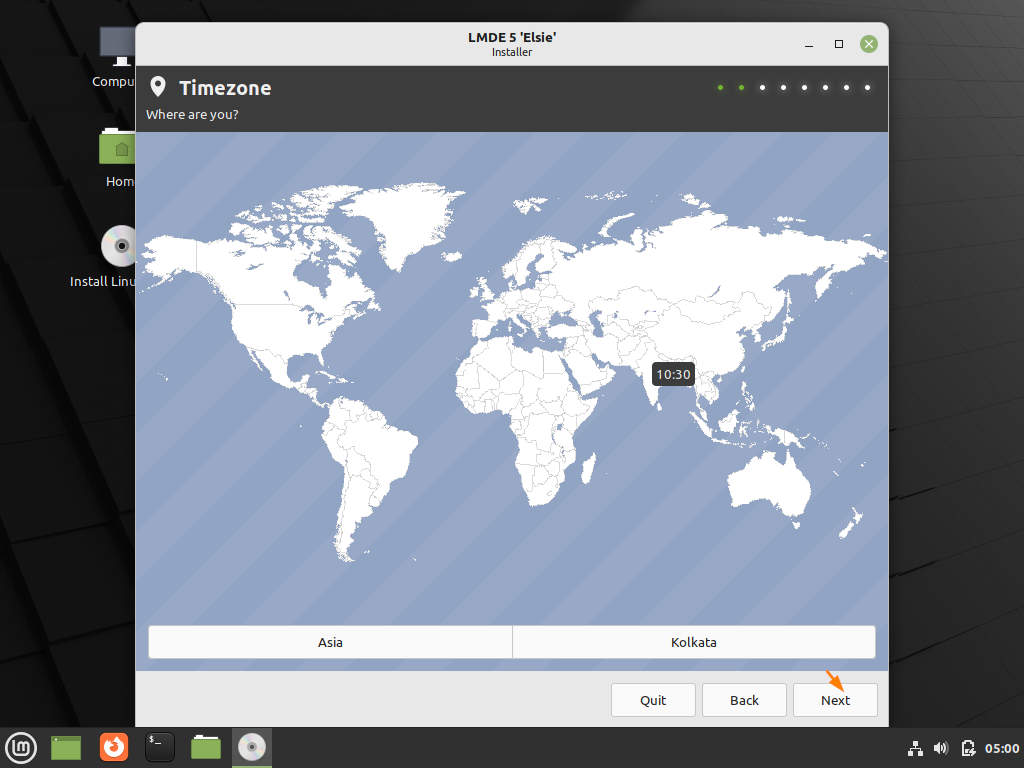
3) Timezone based on Location
Select the timezone based on your location and then click on Next,
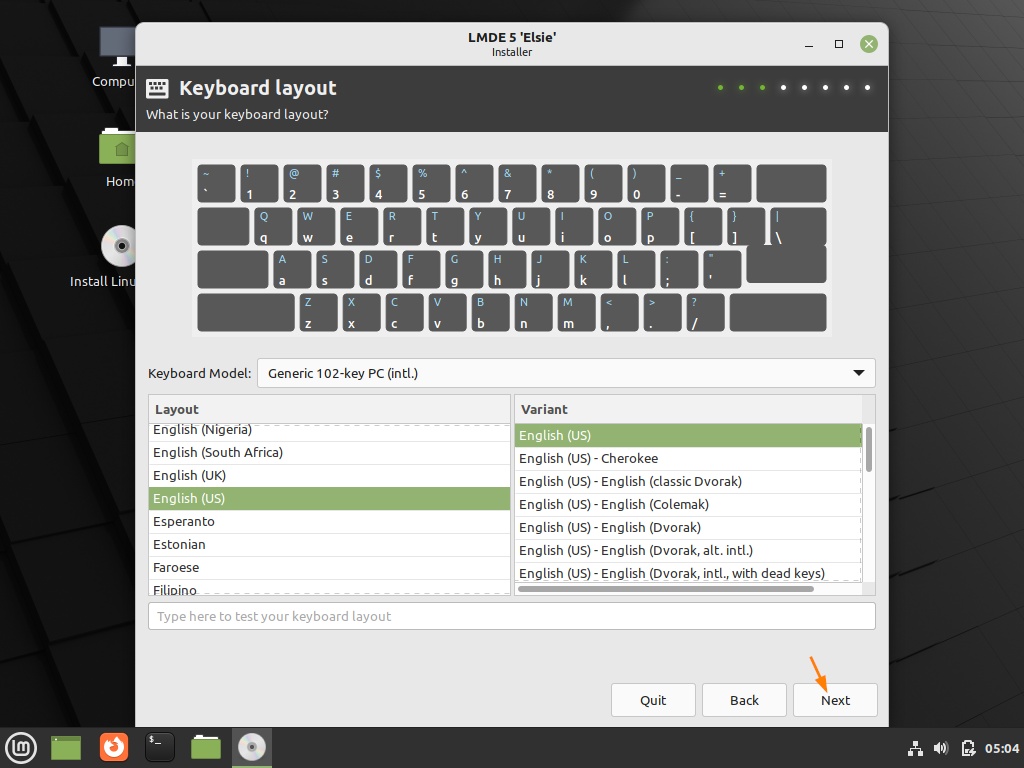
4) Select Keyboard Layout
Select your preferred keyboard layout and choose Next,
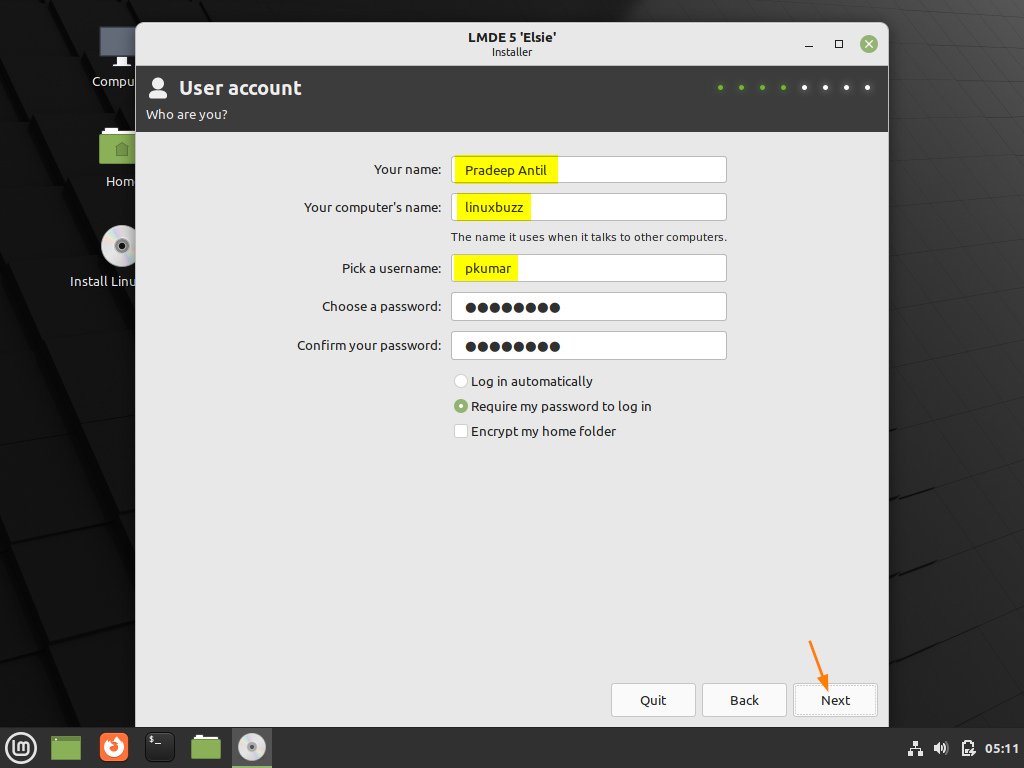
5) Create User Account and Set Hostname
In this step, you will be prompted to enter user account details like its username and password, and it will ask you to set hostname of your system.
Click on Next to proceed further,
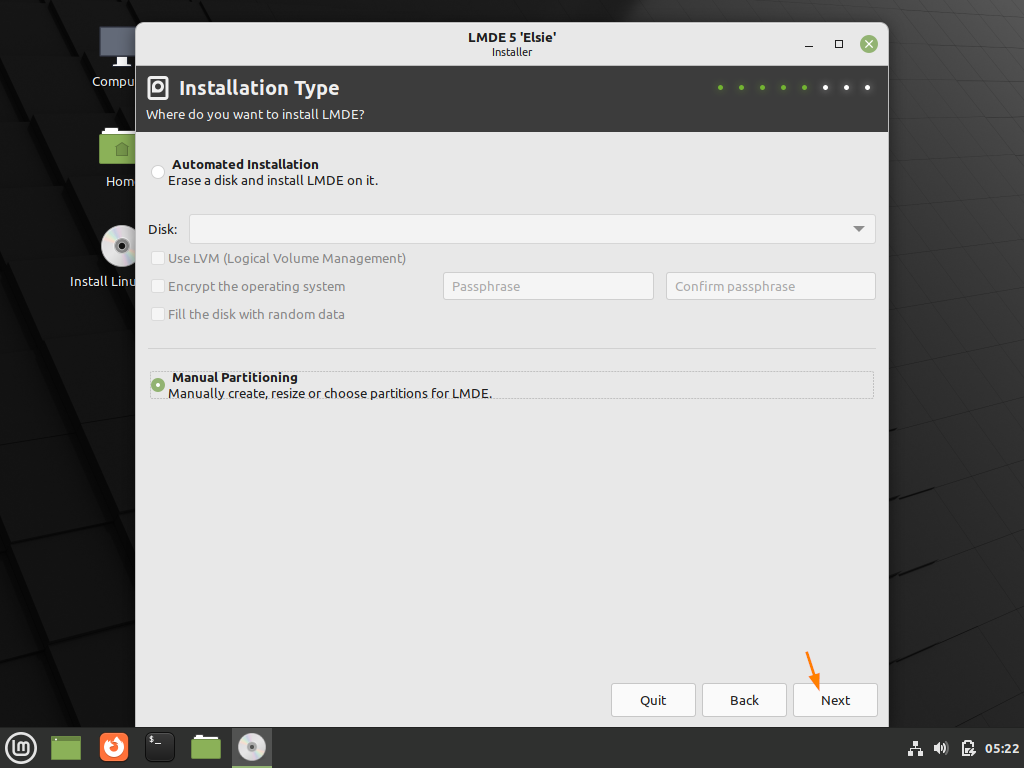
6) Installation Type
In this step, we will decide partitioning scheme for LMDE. Here we have two options,
- Automatic Installation – It will erase the disk and will create the partition automatically.
- Manual Partitioning – It will give us an option to create manual partitions.
If you are new to Linux, then you should go with automatic installation. If you wish to create own customize partition, then choose 2nd option. In this guide, I will demonstrate how to create custom partitions by choosing ‘Manual Partitioning‘
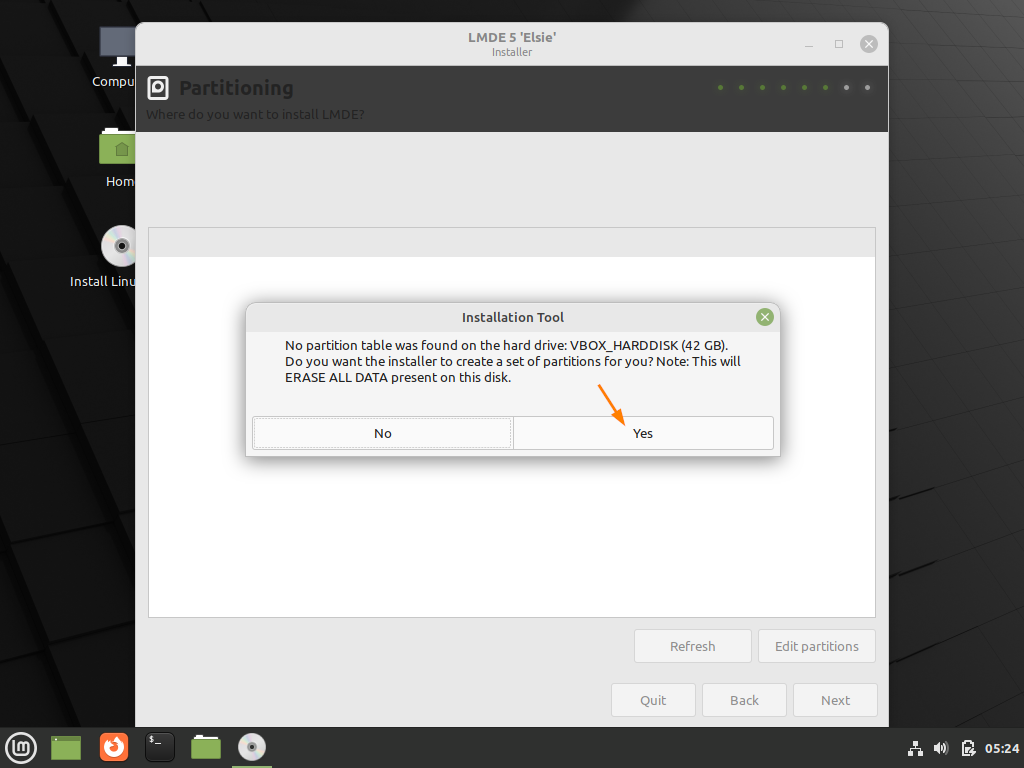
We will get following screen when we click on Next,
Choose ‘Yes’ to erase the data on disk.
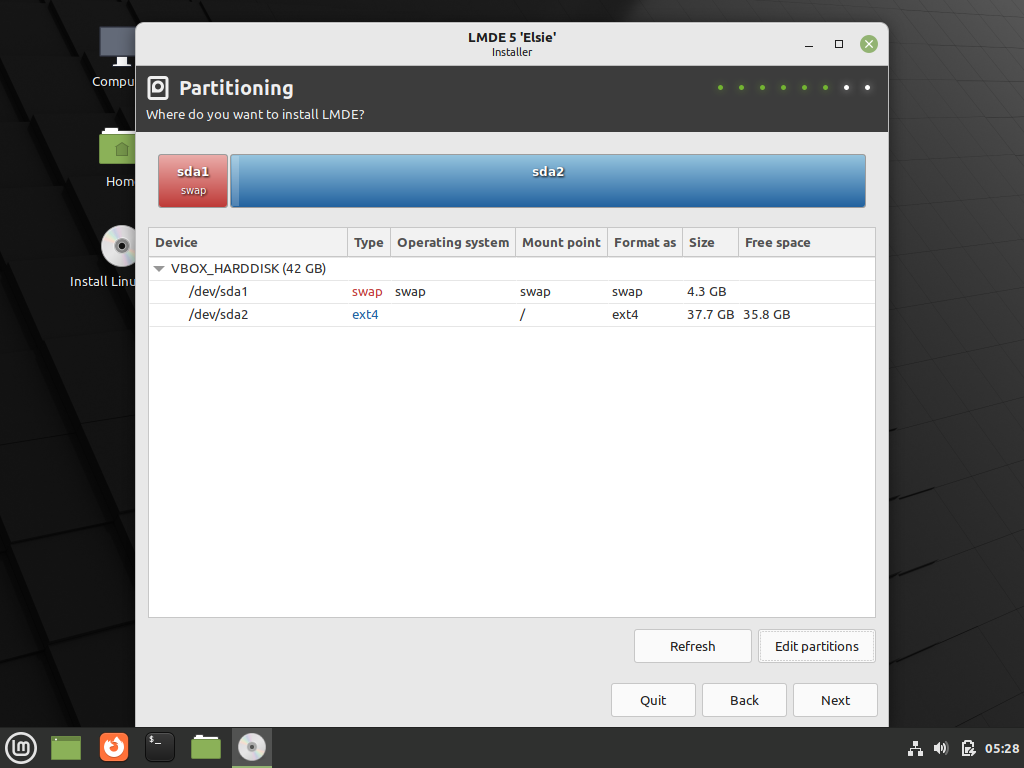
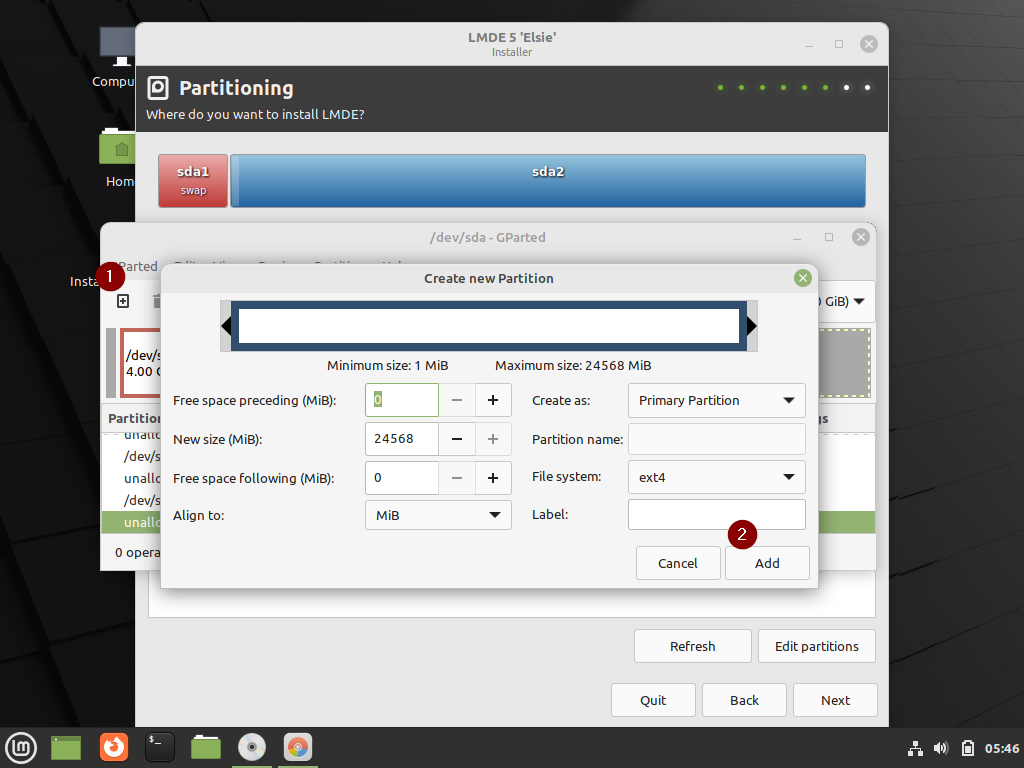
Here we edit the partition size and can also create new partitions. As you can see I have around 40 GB disk, I will create /home partition of size 25 GB but for that I have to resize / file system size to 12 GB.
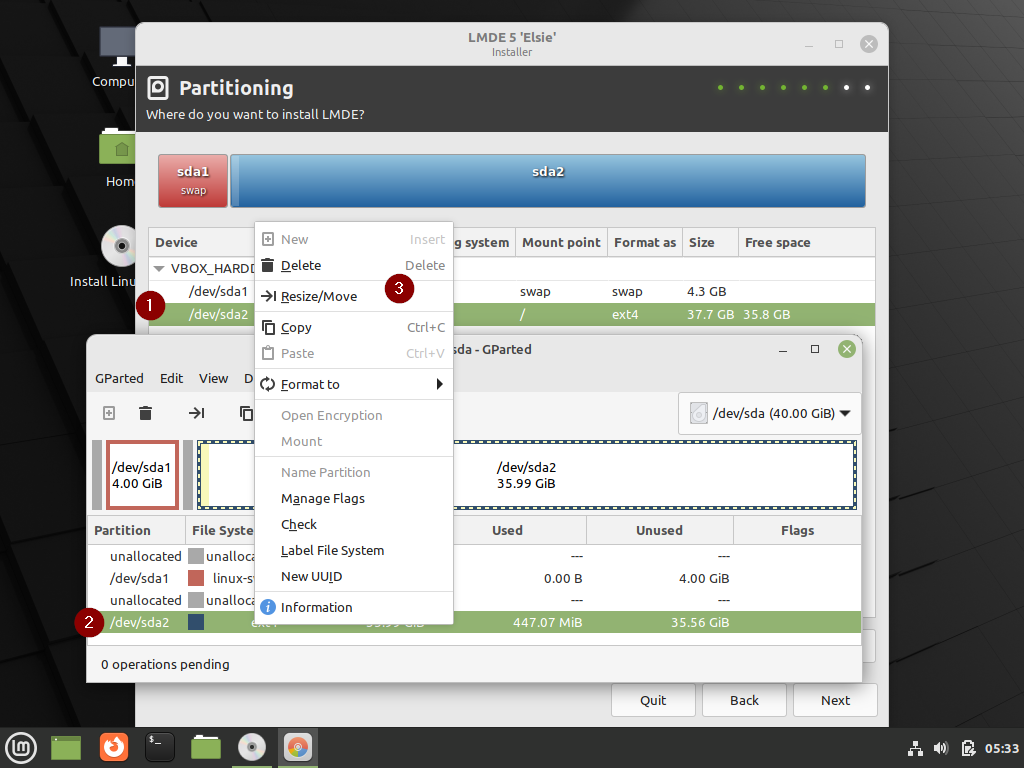
So, choose / partitions and then click on ‘Edit partitions’
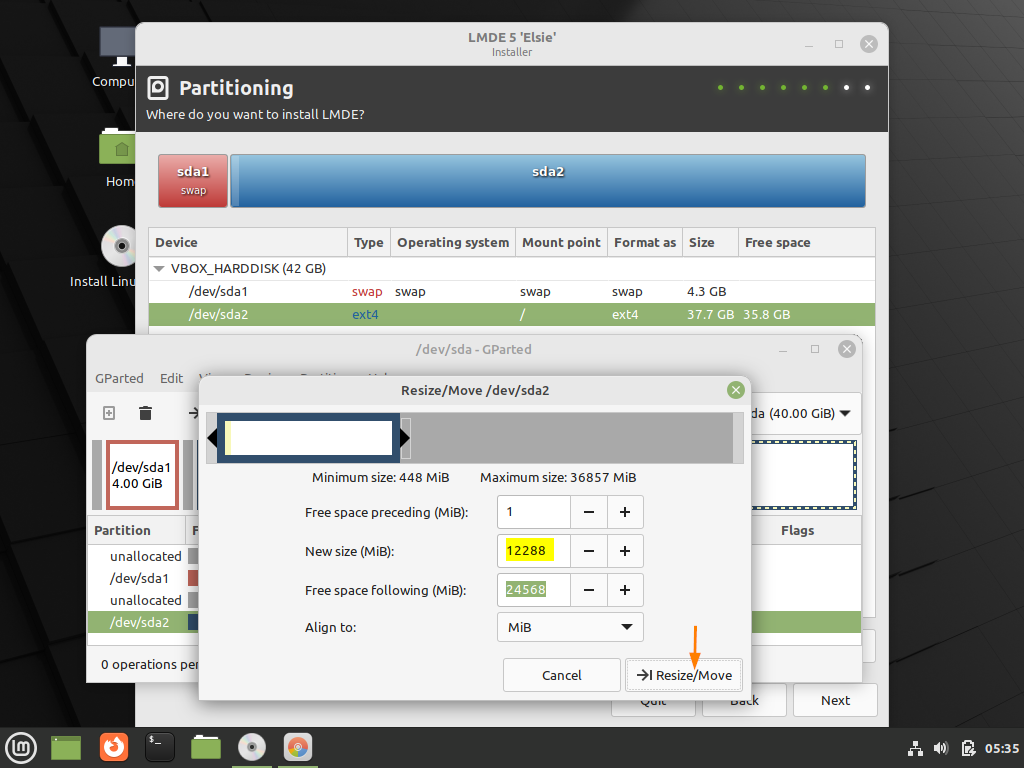
When we select ‘Resize/Move’ option, then we will get following window, specify the size as 12 GB ( or 12288 MB).
Click on ‘Resize/Move’.
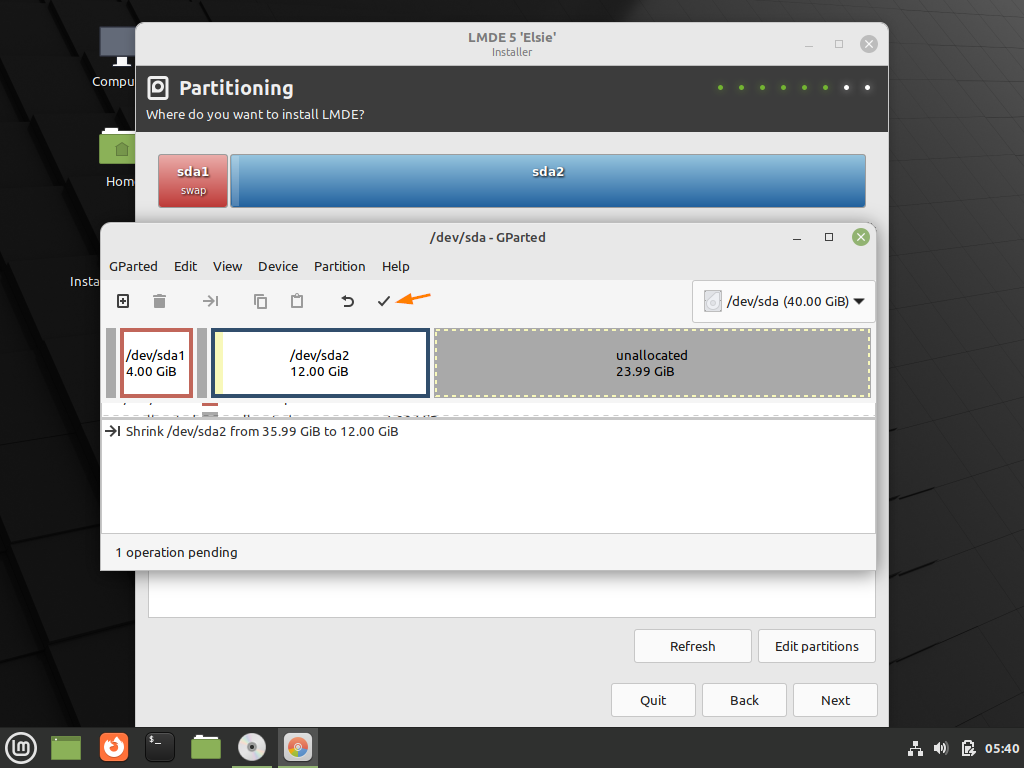
Now click on tick symbol to apply the operation (means resizing the file system size)
Now Click on ‘+’ symbol to create a new partition,
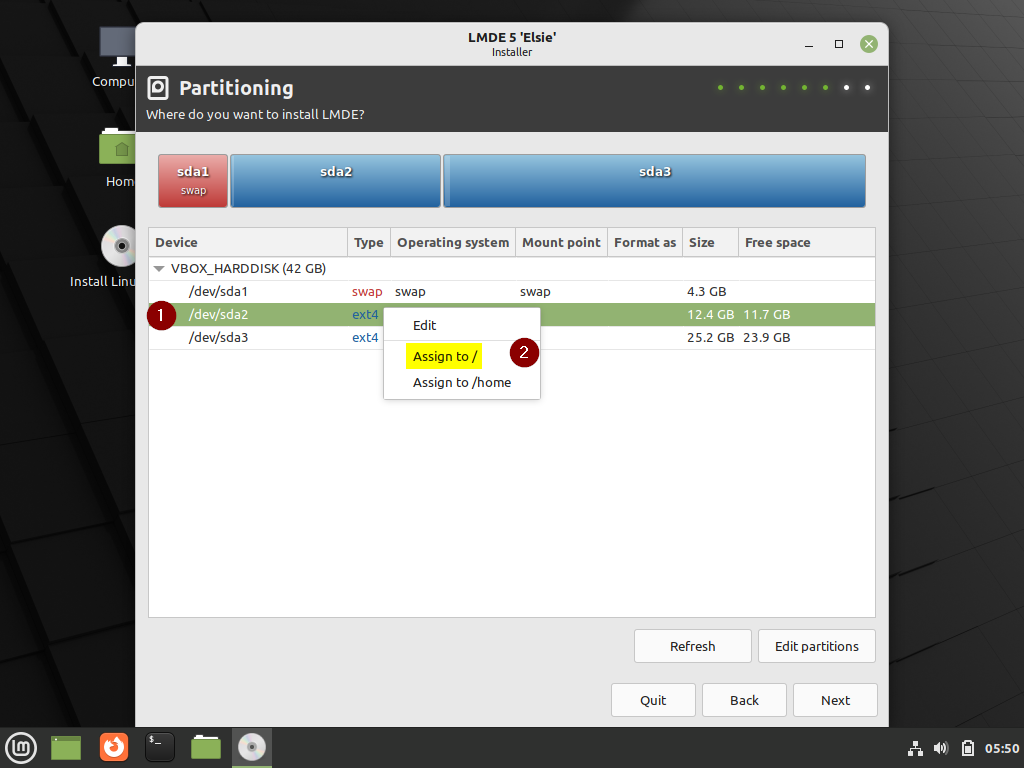
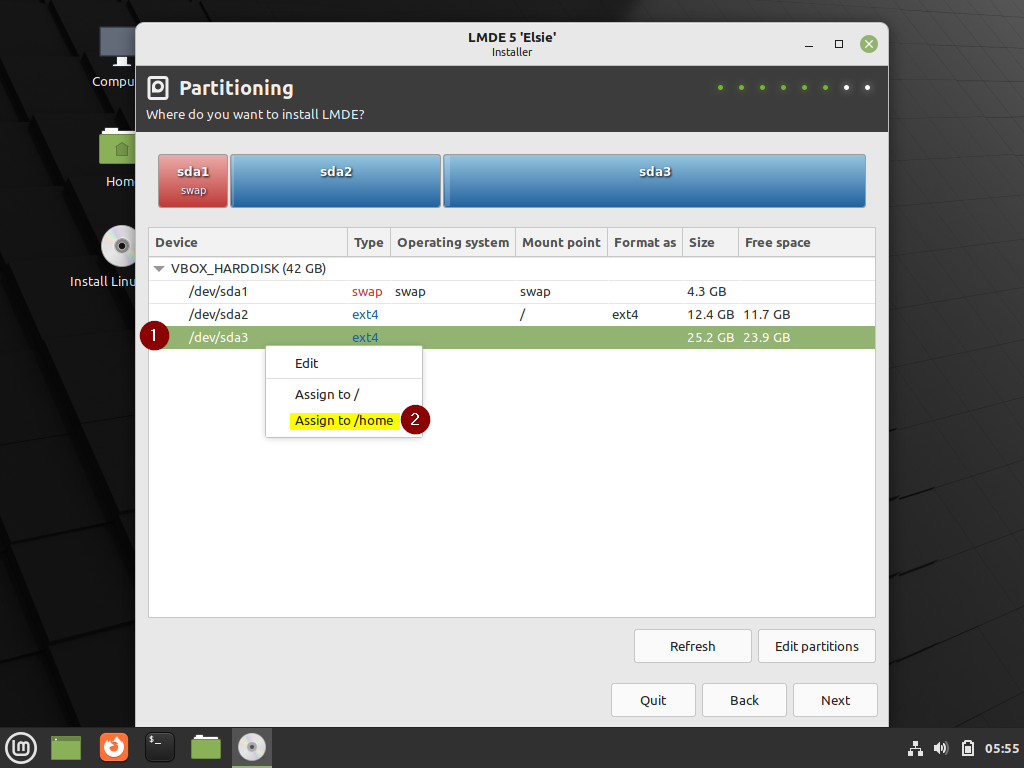
Now mount 12 GB partition of / and 25 GB partition on /home,
Click on Next to proceed further with installation.
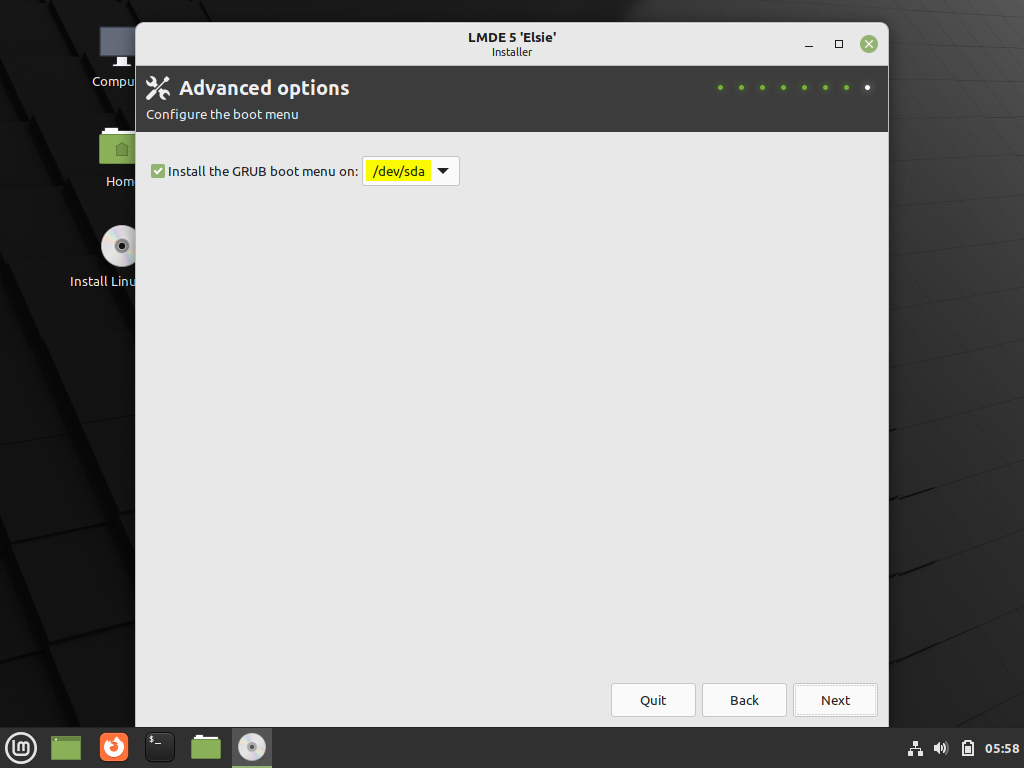
In the following window, choose the disk on which grub will be installed,
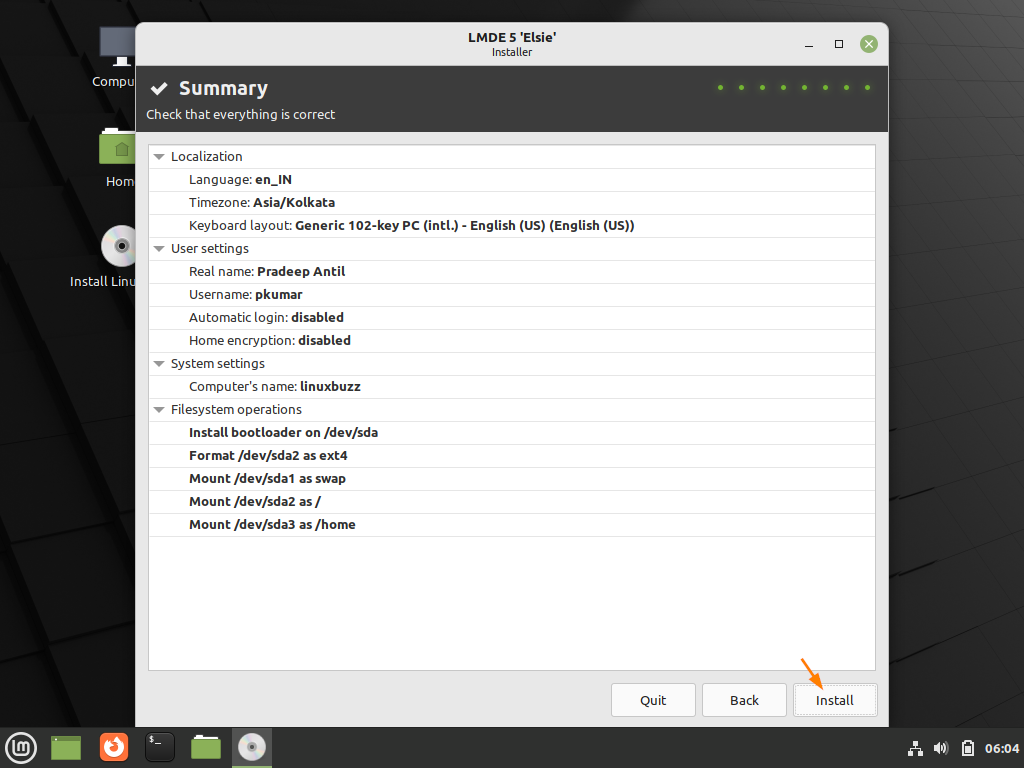
Choose Next then we will get the beneath screen, verify the summary and then click on ‘Install’ to start the installation.
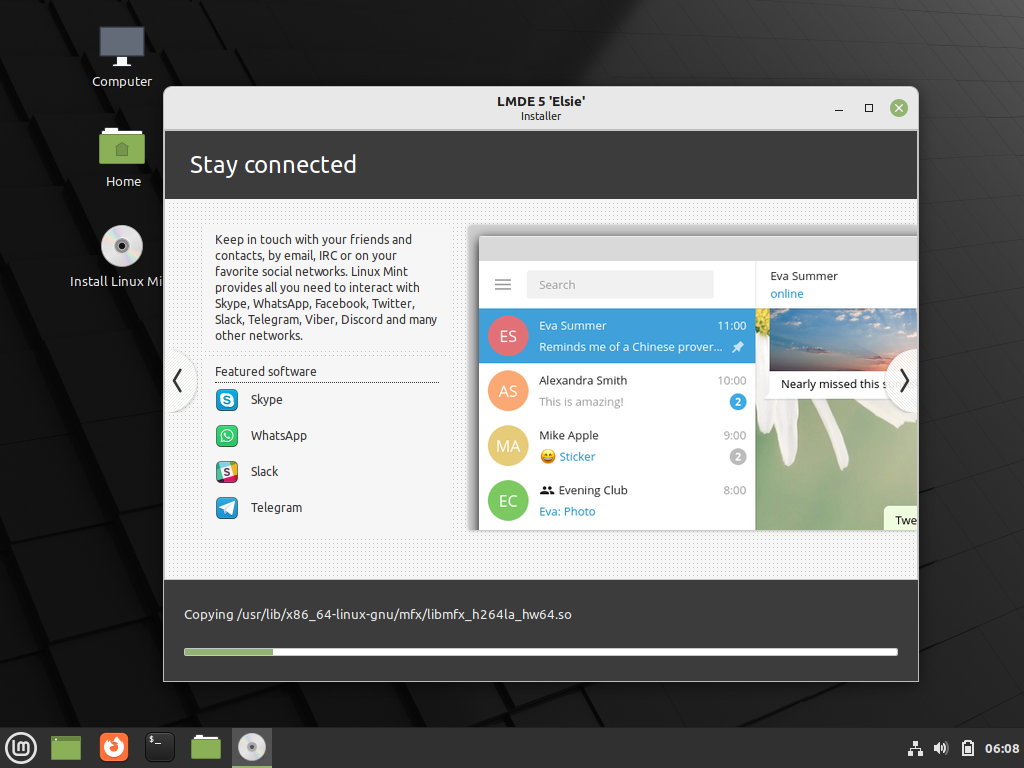
7) LMDE Installation started
In this step, installation got started and is in progress.
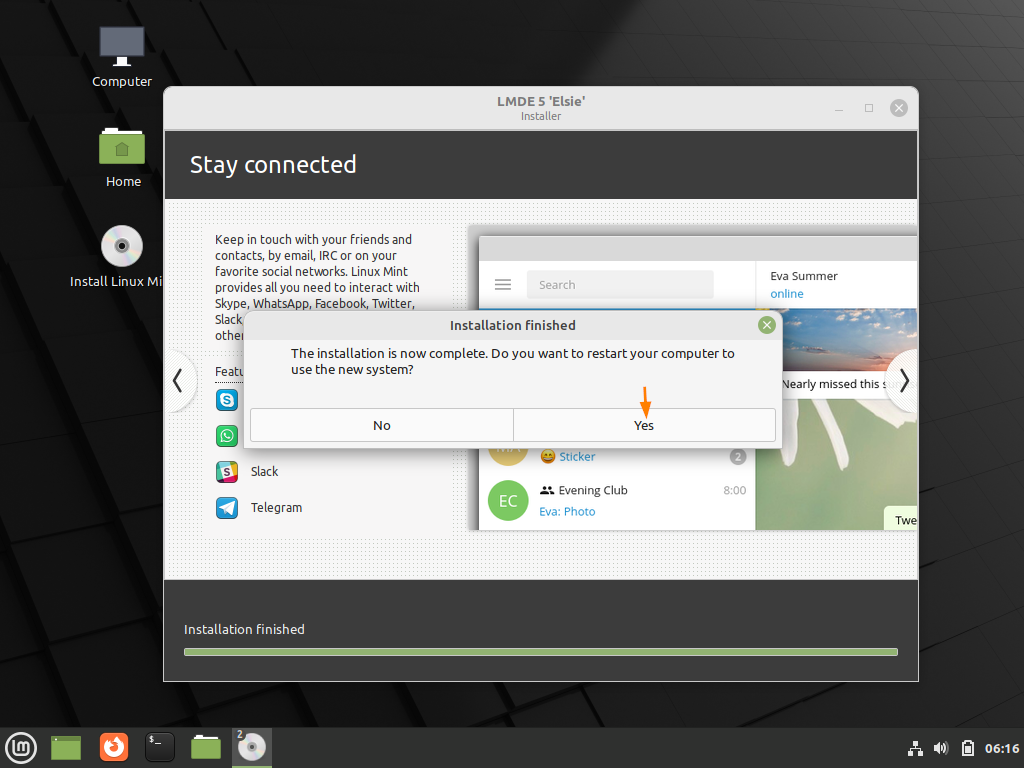
Once the Installation is completed, we will be prompted to reboot the system.
Choose ‘Yes’ to reboot the system.
Note: Don’t forget to change the boot medium from USB to hard disk from bios.
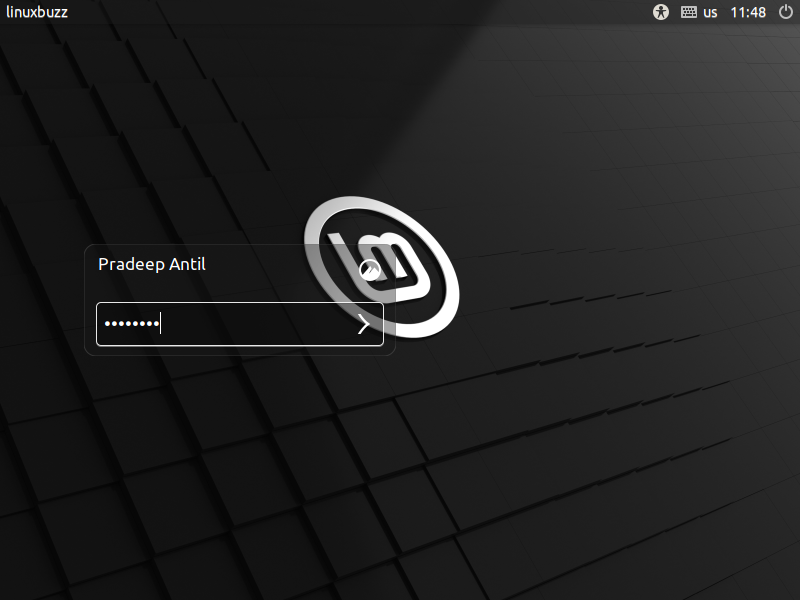
8) Login Screen of LMDE 5 after installation
When the system boots up after the reboot, we will get following screen. Use the same user credentials that we have created during the installation.
That’s all from this guide, I hope you found it informative. Please post your queries and feedback in below comments section.
Also Read: 16 Quick SCP Command Examples in Linux
I’m so grateful for this guide, because I installed LMDE 5 onto an
Acer Aspire One D270-1375 that had a monitor that was too small
to fit the entirety of the installer windows. Using this guide, I tabbed
to the correct buttons on each page to move onto the next page.
I wish I could’ve resized the windows to be shorter, but, alas, that was
not permitted. So it’s very good that this guide was available. 🙂
Pradeep,
Manual install of LMDE 5 did not go well on my side. Perhaps you have thoughts about the questions below.
As background; (*) Using 500gb NVME in M.2 slot for OS and a separate nvme disc for data (in x4 slot), (*) Created three partitions; boot, swap and root. (*) Went through manual steps, restarted, and received grub rescue> _
(*) Scrubbing drives;
Do you recommend scrubbing disk before installing a new OS, or is it enough to let the install process erase files?
(*) Existing partitions,
We’re deleted, and three new ones created; boot, swap and root.
(*) Disconnect all other drives;
During install, two raid drives and 1TB drive remained in the machine, along with target OS drive. In the summary page, the new configurations appeared, but also changes to raid and 1TB partitions. Is this normal, is this to facilitate grub, is it safe, why were files in raid and 1tb changed?
Do you recommend pulling all other drives in the machine before installing a new OS?
(*) Load optimized results,
Before installing Elsie, bios was upgraded to F7, which in theory, enables M.2 slot to support a bootable drive. Upgrade went fine. However, due to conflicting advise, “Load optimization defaults,” was not performed, and still do not know if this is recommended or will return system to prior bios version.
(*) Grub recovery;
After installing Elsie, and after restart, ended with grub rescue prompt. Decided to reinstall Elsie; which is easier than fixing grub (out of my league). Second time around, a few changes were made to; assignments, and to checkmarks, steps which may have impacted the first installation.
Aborted the process on the summary page. Because it included changes to raid and 1tb partitions. Which I do not want to mess with, unless its normal and safe.
Thank-you for considering my query;
john
Hi John,
I would recommend pull all other drives from the system then try to install OS on the target disk. During the installation, Grub must be installed on OS disk, if it is installed on other disk then OS will not boot and will get grub recovery screen.
I hope it helps.
Regards,
Pradeep
Pradeep;
Thank-you. Pulled raid hdd’s and gentoo ssd before reinstalling Elsie. No luck. Ran “load optimized results” from bios and reboot. Grub issue disappeared and Elsie came up, yeah!
Put gentoo drive back in and machine booted straight to login page but rejected password, repeatedly. I took Elsie setup out, and put raid drives back in. With the machine back to its original state; gentoo and raid, powered up, went to grub and bingo, gentoo runs!
It appears that Elsie and Gentoo run independently but not together in the same machine. Of note is that gentoo boots all the way to login page, but password is rejected. Hmm? Bios seems right, but wonder if it may need both systems installed. Meaning, Elsie and gentoo and data disks – installed in the machine. Then run “load optimized defaults.”
So close…
Your consideration is appreciated.
Pradeep;
Found answer: when Gentoo failed to login, it was necessary to also install raid back into the system. Gentoo needs to read the home directory on raid, otherwise, user does not have permission to create it. Hence, repeated rejection of password.
Also put Elsie back into play and it boots; now Elsie and Gentoo co-exist.
iohn
Thank you for this guide, much like a previous poster my notebook has a smaller screen that cannot see the bottom of the install menu. With you screenshots I was able to tab my way through the installation. Now the question is, will the work on my Atom N270 processor 😂